




CONTENTS
- HA Tracker - Options - Device Trackers - Home Assistant - OwnTracks - GPSLogger - Traccar Client - Traccar Server - 3D Map - Screens - Users - Zonas - Filters - ChatGPT - AutomationsINTRODUCTION
- HA Tracker is an application designed to track the position of registered Home Assistant users who send positions through various mobile applications
- You can manage specific zones of the application
- It also allows you to filter positions between two dates, grouped by zone, and obtain a detailed summary with statistics
- It offers a panel and a card for home assistant as well as a blueprint to create automations
- It is also integrated with ChatGPT using a GPT to query users' positions over time
REQUIREMENTS
To install this integration in Home Assistant, you will need:
- An installation of Home Assistant (see https://www.home-assistant.io/)
- HACS installed in your Home Assistant environment (see https://hacs.xyz/)
- For security, HA Tracker requires Home Assistant to work over https. For that you have several alternatives from "Settings → Add-ons → Add-on store":
INSTALLATION
HA Tracker
The steps to install this integration are as follows:
- Click
- Click on download and install
- Restart Home Assistant.
- Go to: "Settings → Devices and Services → Add Integration"
- Search for HA Tracker, select it and on the Configuration screen, configure options and press Send

https://HOST/ha-tracker/index.html
This URL accepts 2 parameters:
- debug=1: to avoid using minified JavaScript
- token=ll_token: Where "ll_token" is a long-lived token
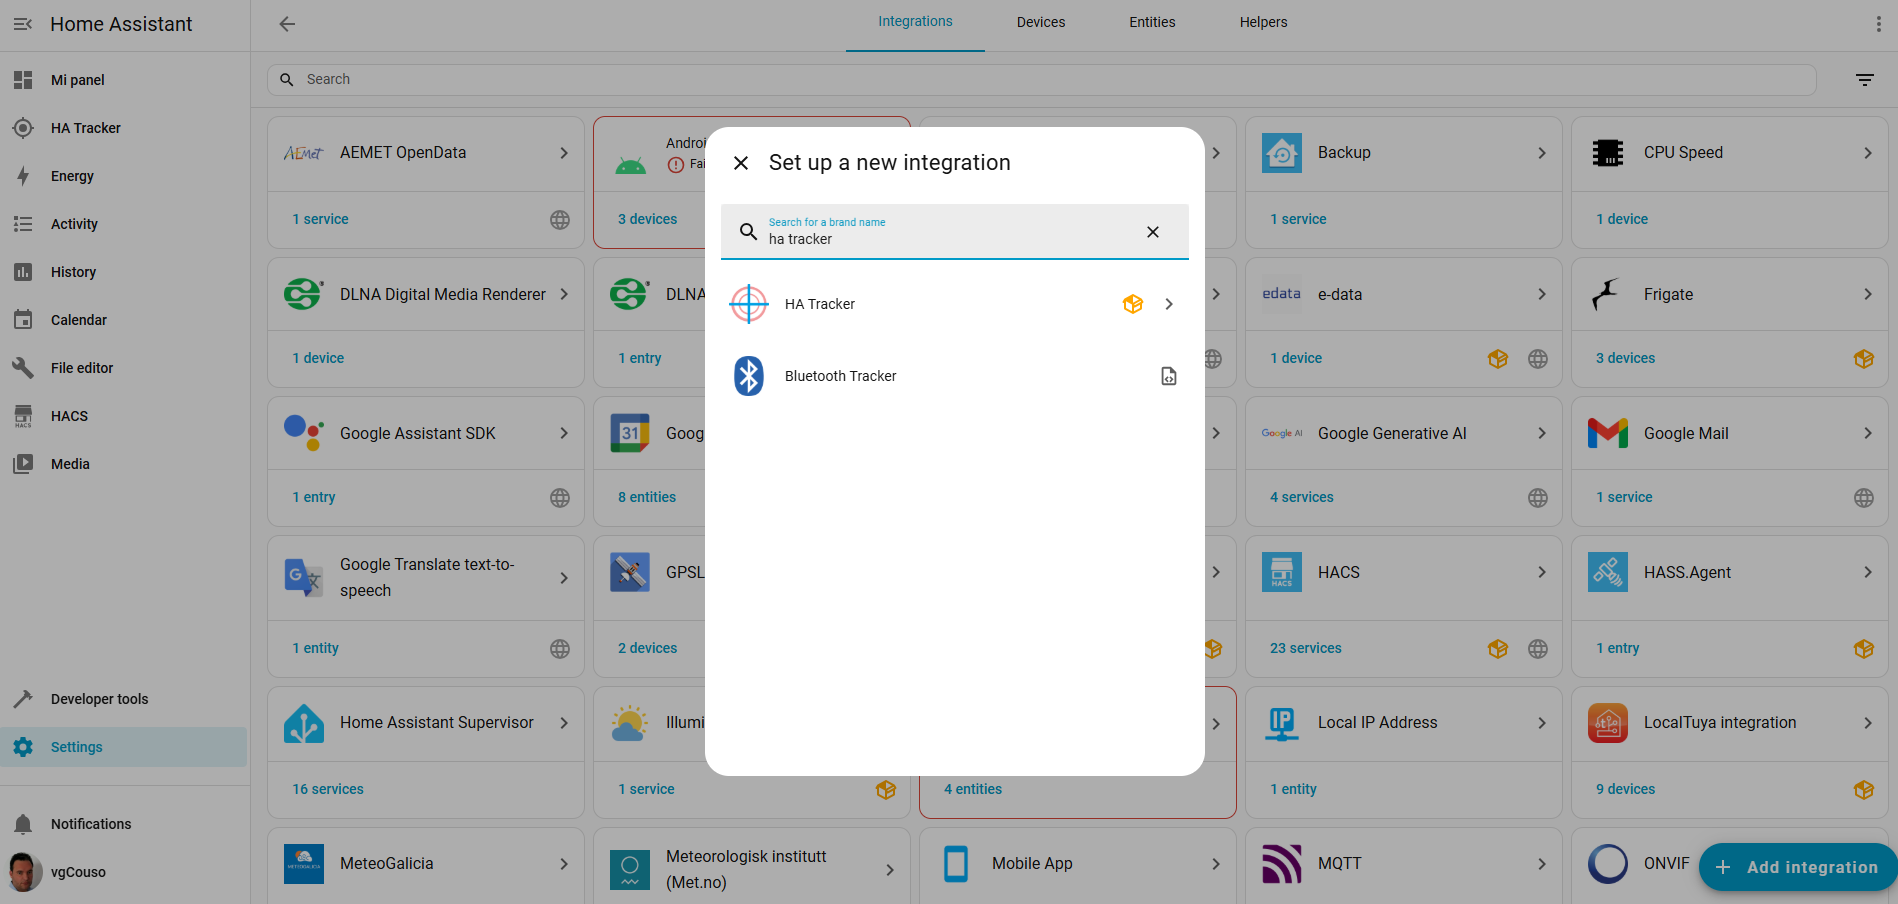
This is the install screen
Once HA Tracker is installed a Custom Card will be available to place on the panels
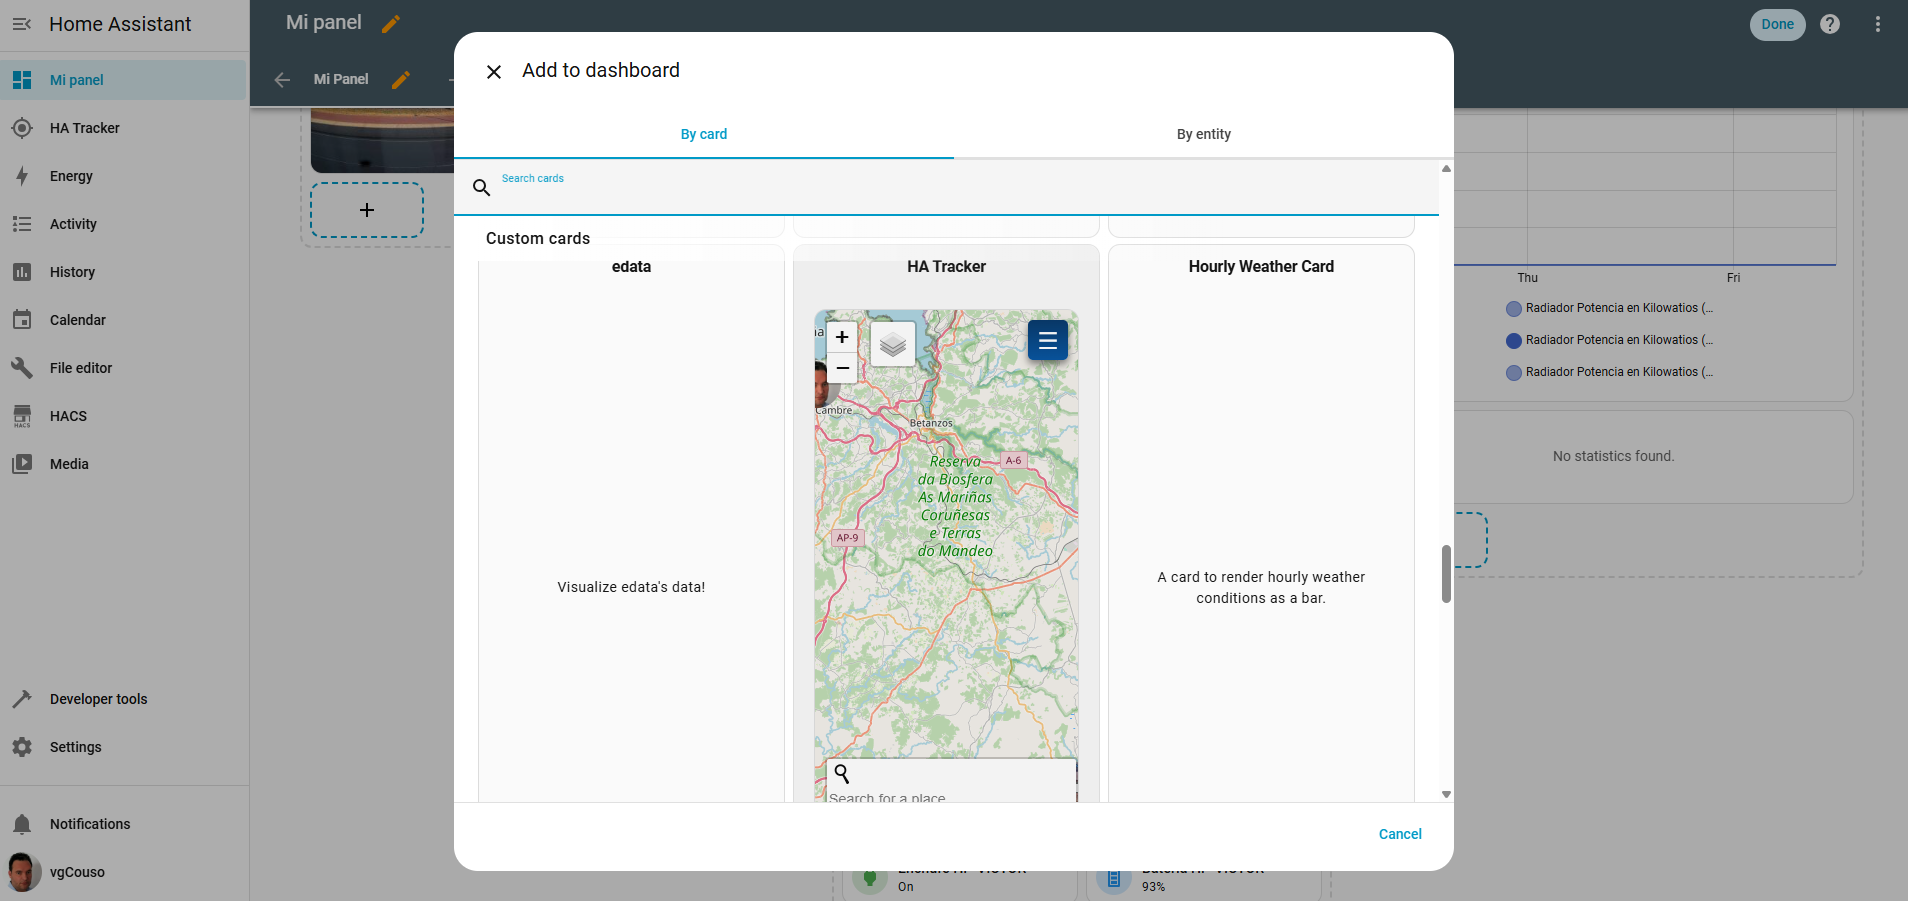
This is the card screen
By default, Home Assistant stores 10 days. You can increase this time, but keep in mind that this will increase the database size. It's also best to use MariaDB as your database. Here are the instructions for Home Assistant OS or Supervised:
- Go to: Settings -> Add-ons -> Add-on Store -> MariaDB -> Install
- Once MariaDB is installed, go to its settings and, under Logins, enter a password for the homeassistant user.
- To store 30 days, add the following to the "configuration.yaml" file:
purge_keep_days: 30
auto_purge: true
db_url: mysql://homeassistant:[PASSWORD]@core-mariadb/homeassistant?charset=utf8mb4
- Finally, restart Home Assistant
Options
- General:
- Geocoding:
- Stops:
You must adjust these two parameters according to the application used to send the positions and the device on which it is installed.
- Accuracy:
- Anti-spike:
You must adjust these two parameters according to the application used to send the positions and the device on which it is installed.
- Sources:
The server requests addresses from openstreetmap.org which has a limit of one request per second
Increase Geocoding Time and Minimum Distance for Geocoding if you have many open applications and connected devices
The URLs for OwnTracks and GPSLogger must be changed and are used in the mobile apps to access the properties that will connect it to the Home Assistant integration
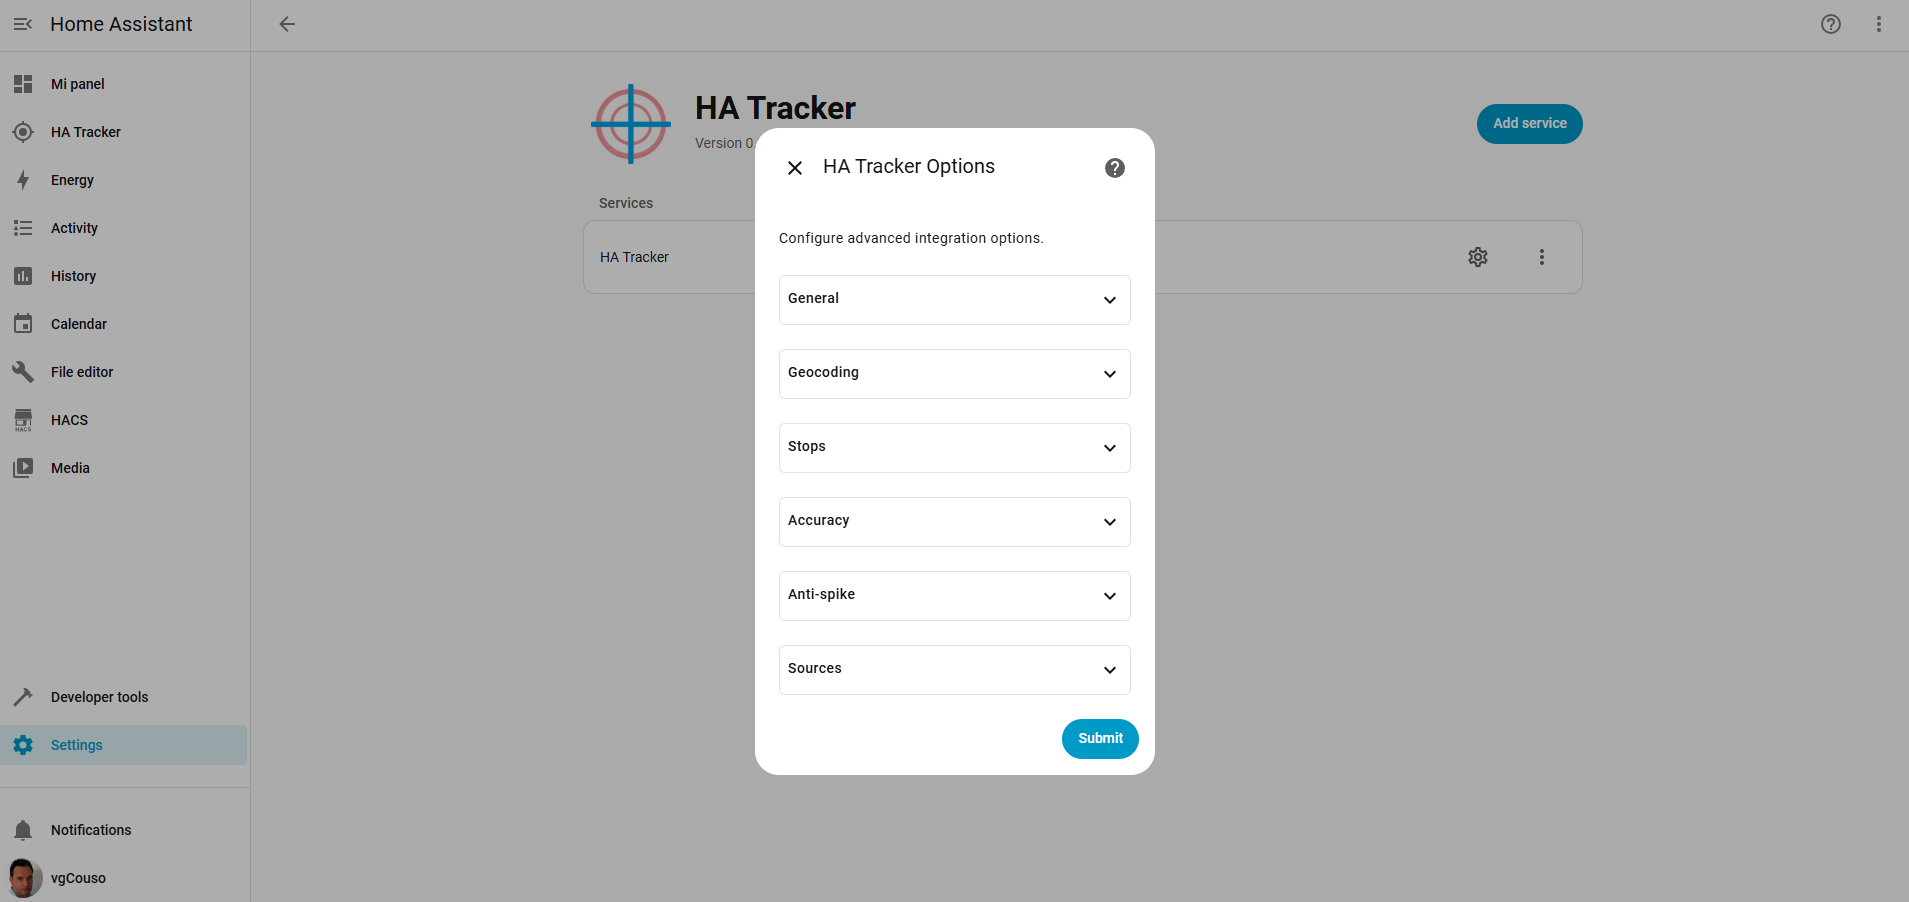
This is the options screen
Device Trackers
You must install an app on your smartphone to send managed positions through Home Assistant integrations. We'll look at some of them below.
Integrations create Device Trackers in Home Assistant when connected and they are shown in the integration where you can rename them in: "Settings → Devices and Services → Integration → Pencil icon next to the device"
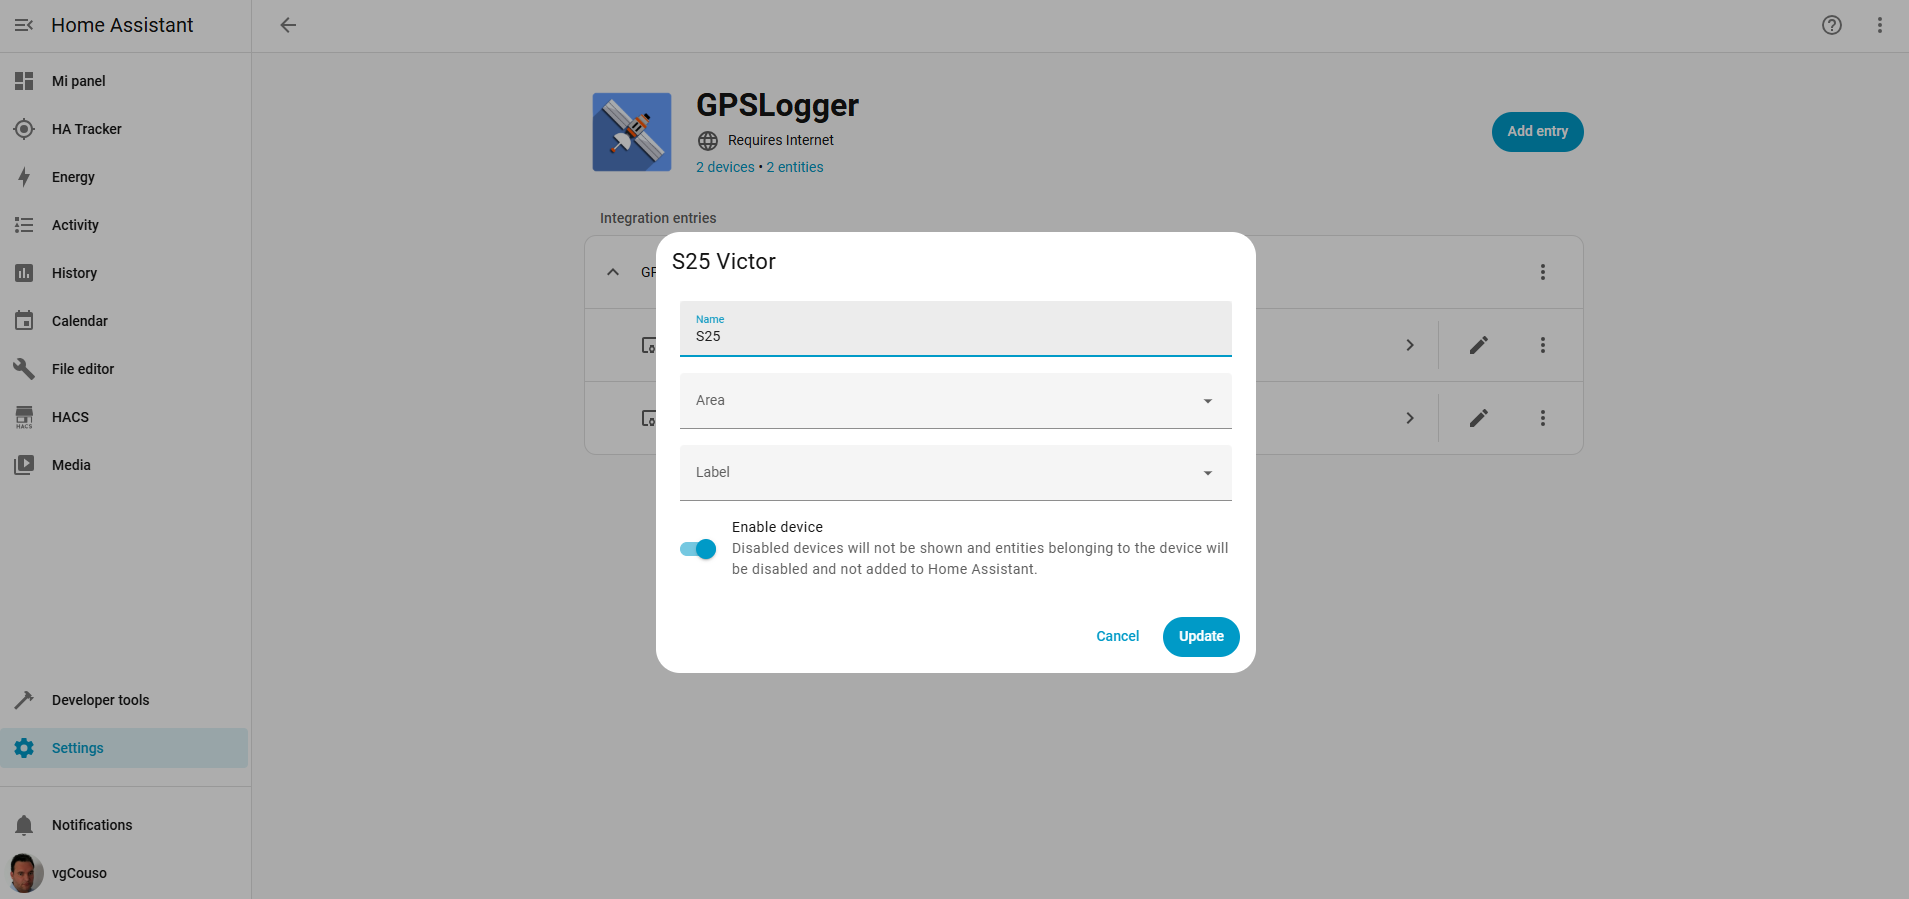
This is the change name screen
Device Trackers must be assigned to users: "Settings → People → Username → Devices that belong to this person"
Important: If there are multiple devices associated with a person, HA Tracker takes the first one.
Home Assistant
Home Assistant for mobile is the official app and is available for both: iOS and Android devices. Then: - The first thing to do is connect to Home Assistant and give the device a name - Then, grant it the permissions it requests
- Then, assign the device to a person in Home Assistant: "Settings → People"
- In Home Assistant, you'll find connected devices under: "Settings → Devices & services → Mobile App"
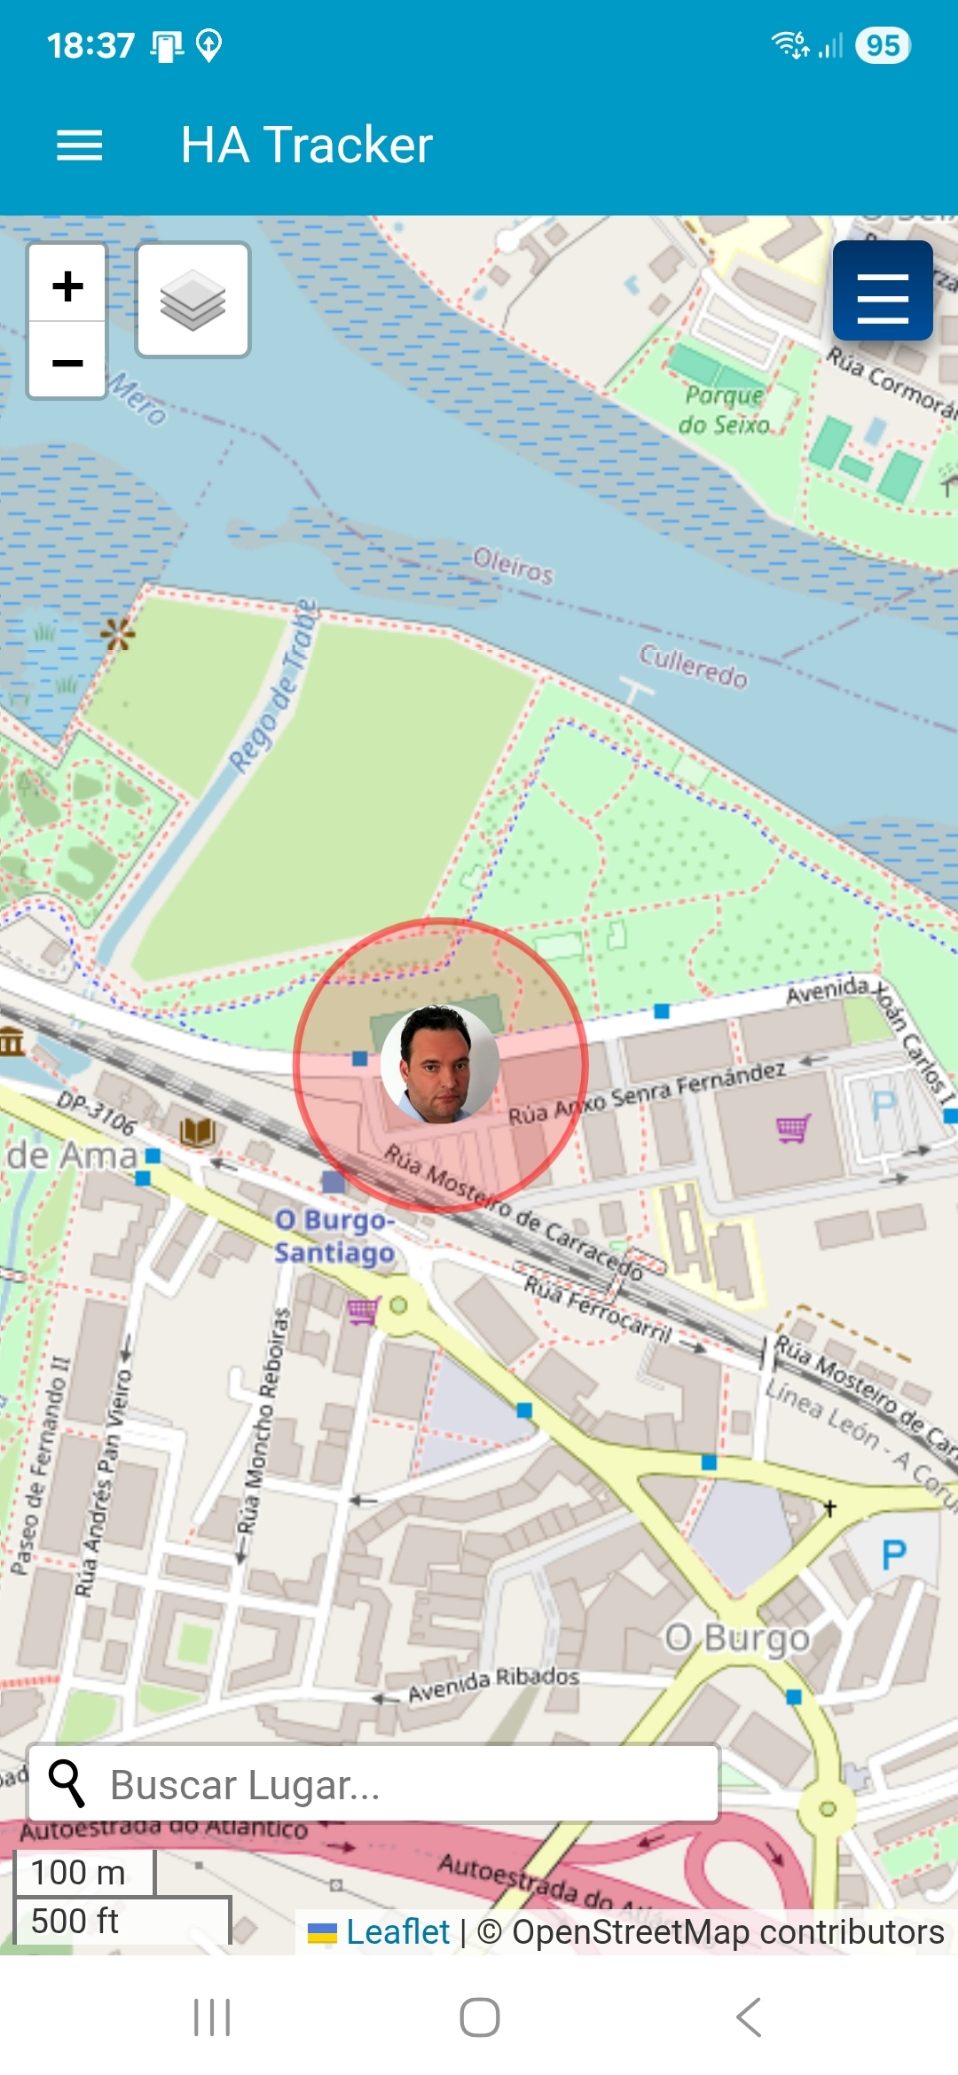
This is Home Assistant with HA Tracker
In Android make sure in the "Settings → Companion app" that:
- Background access is enabled
- "Manage sensors → background location" is enabled. Here you can activate High precision mode (consumes more battery but provides more positions) and define every how many seconds you want to receive positions.
OwnTracks
OwnTracks is an iOS and Android app designed to send your phone's positions to a URL.
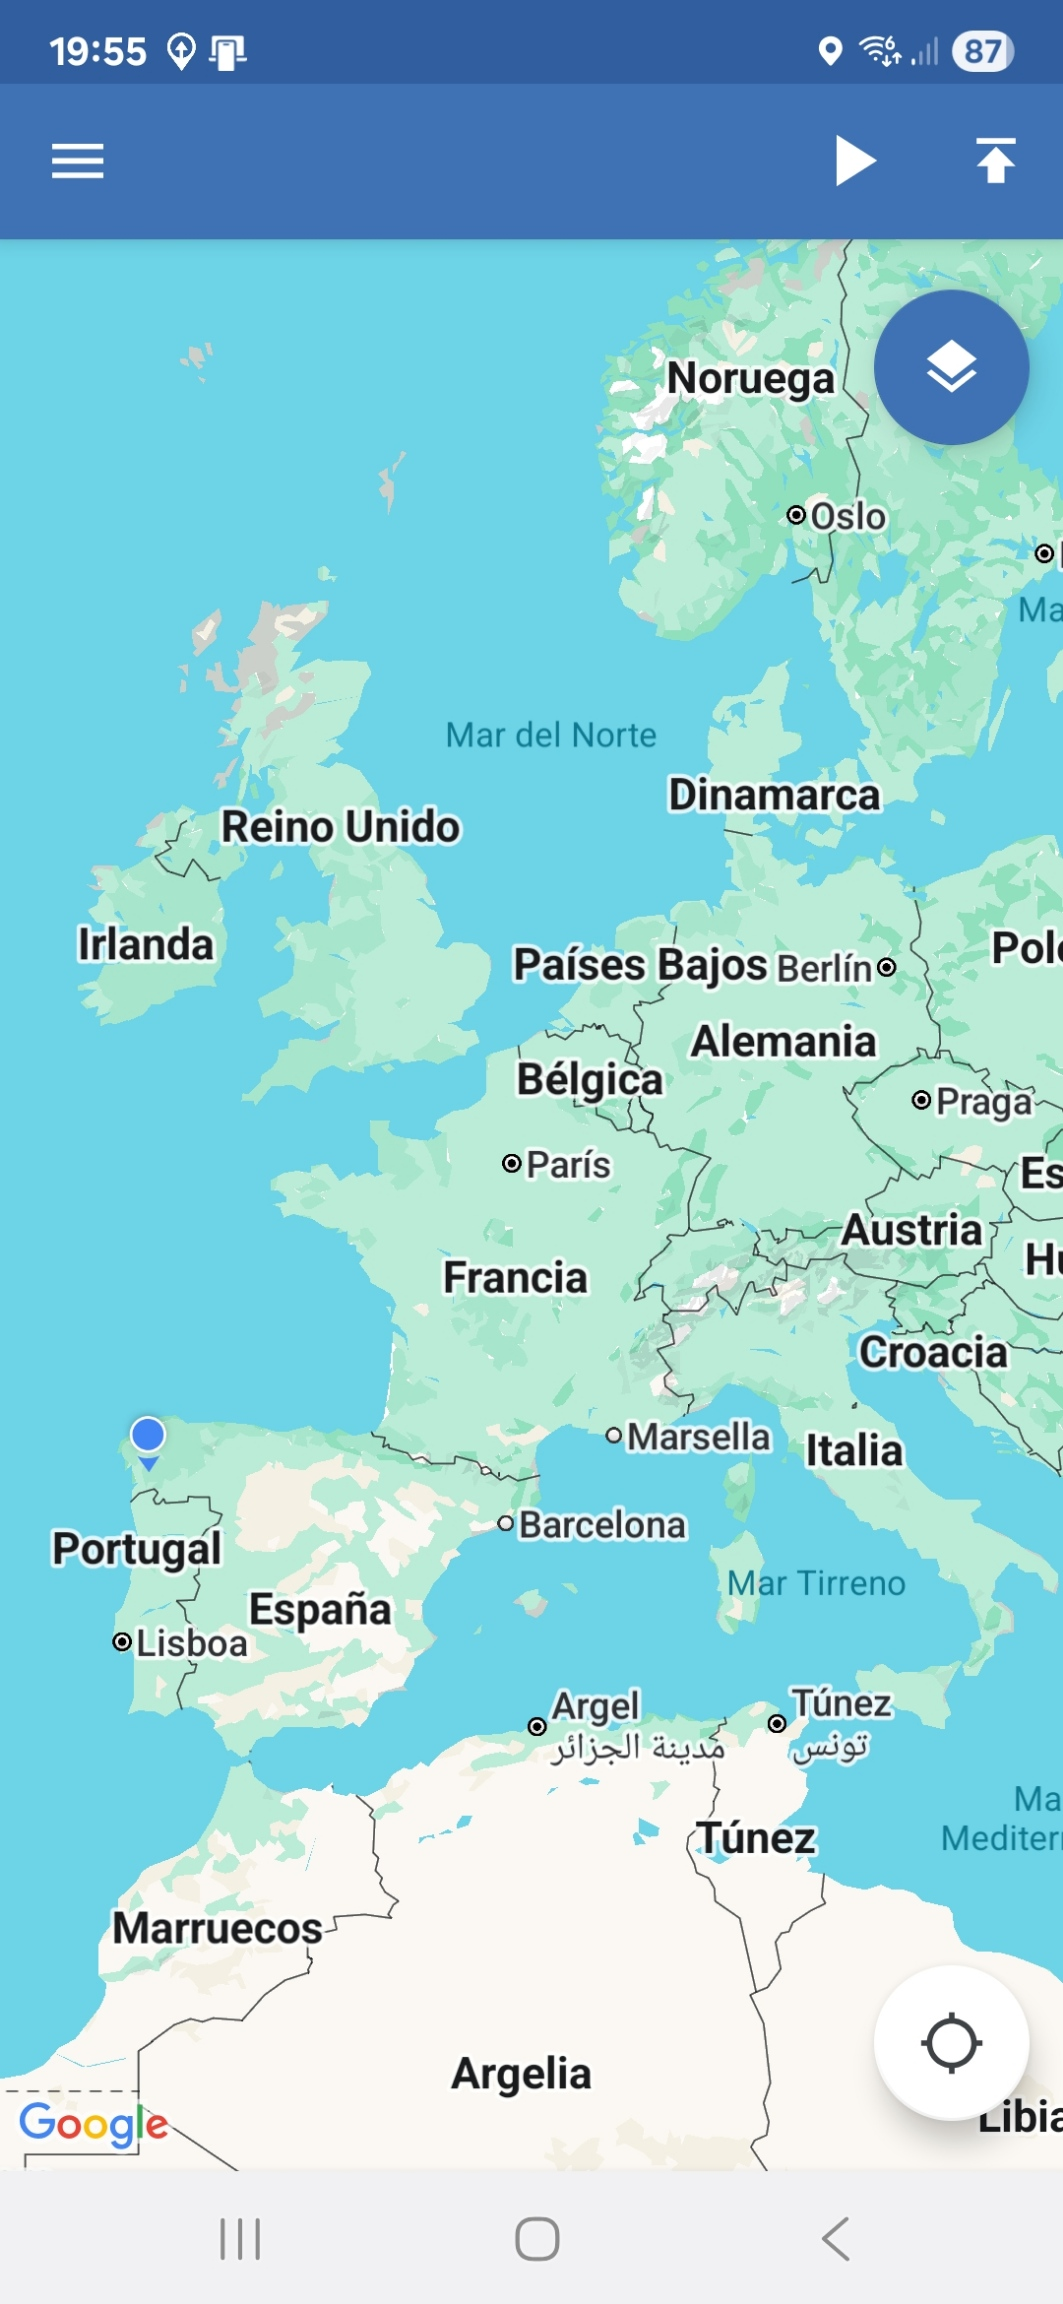
This is the OwnTracks screen
The first thing you need to do is install the OwnTracks integration: - Go to: "Settings → Devices and Services → Add Integration" - Search for OwnTracks, select it. The configuration screen will open - Press Send button and integration will be created
Then you can then install OwnTracks on your devices from iOS and Android. Then: - Allow the permissions that the application requests for its correct operation. - On some Android versions, restarting your phone requires you to open the app to send positions. Sometimes setting the app to use the battery without restrictions, always allow location and allow notifications fixes it. - On some devices you must enable the option to run in the background
To configure the application: here's a link - Set a unique Device ID and Tracker ID for each phone - The URL provided to you when setting up the integration can also be found under "Settings → Devices & services → HA TRacker → Configuration → Sources"
- In Home Assistant, you'll find connected devices under "Settings → Devices & services → OwnTracks"
- Finally, assign the device to a person in Home Assistant: "Settings → People"
GPSLogger
GPSLogger is an Android app designed to store or send your phone's positions to a URL.
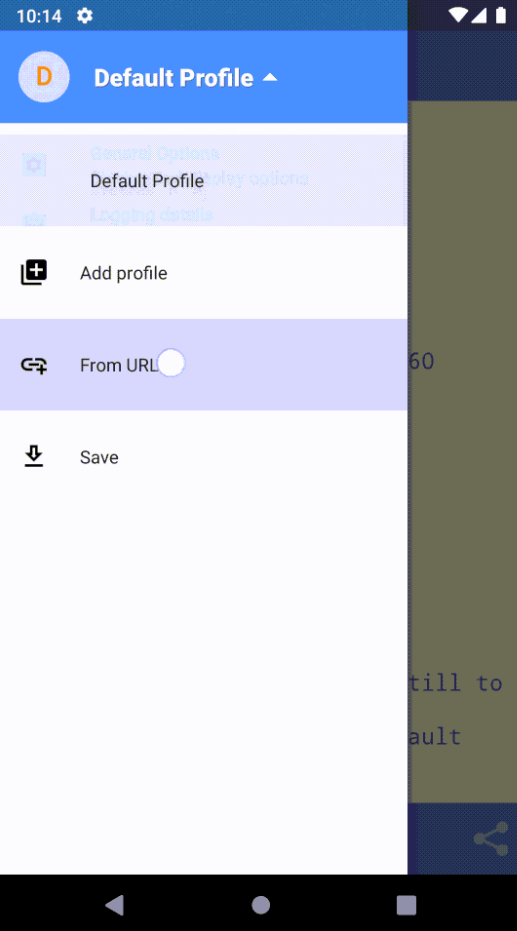
This is the GPSLogger Android screen
The first thing you need to do is install the GPSLogger integration: - Go to: "Settings → Devices and Services → Add Integration" - Search for GPSLogger, select it. The configuration screen will open. - Press Send button and integration will be created Then you can then install GPSLogger on your devices through the F-Droid Android app store.

To install GpsLogger: - Allow the permissions that the application requests for its correct operation. - On some Android versions, restarting your phone requires you to open the app to send positions. Sometimes setting the app to use the battery without restrictions, always allow location and allow notifications fixes it. - On some devices you must enable the option to run in the background To configure the application: here's a link - The URL provided to you when setting up the integration can also be found under "Settings → Devices & services → HA TRacker → Configuration → Sources"
- In Home Assistant, you'll find connected devices under "Settings → Devices & services → GPSLogger"
- Finally, assign the device to a person in Home Assistant: "Settings → People"
Traccar Client
Traccar Client is an iOS and Android app designed to send your phone's positions to a URL.
The first thing you need to do is install the Traccar Client integration: - Go to: "Settings → Devices and Services → Add Integration" - Search for Traccar Client, select it. The configuration screen will open. - Press Send button and integration will be created Then you can then install OwnTracks on your devices from iOS) and Android. Then: - Allow the permissions that the application requests for its correct operation. - On some Android versions, restarting your phone requires you to open the app to send positions. Sometimes setting the app to use the battery without restrictions, always allow location and allow notifications fixes it. - On some devices you must enable the option to run in the background
To configure the application: here's a link - Set a unique Device identifier - The URL provided to you when setting up the integration can also be found under "Settings → Devices & services → HA TRacker → Configuration → Sources"
- In Home Assistant, you'll find connected devices under "Settings → Devices & services → OwnTracks"
- Finally, assign the device to a person in Home Assistant: "Settings → People"
Traccar Server
Traccar Server allows you to view the real-time location of your GPS devices.In Traccar server you need to create two Computed Attributes: - For Battery with: - Description: "batteryLevel" - Attribute: "Battery level" - Expression: "batteryLevel" - For Speed with: - Description: "speedMps" - Attribute: "Speed" - Expression: "speed * 0.514444"
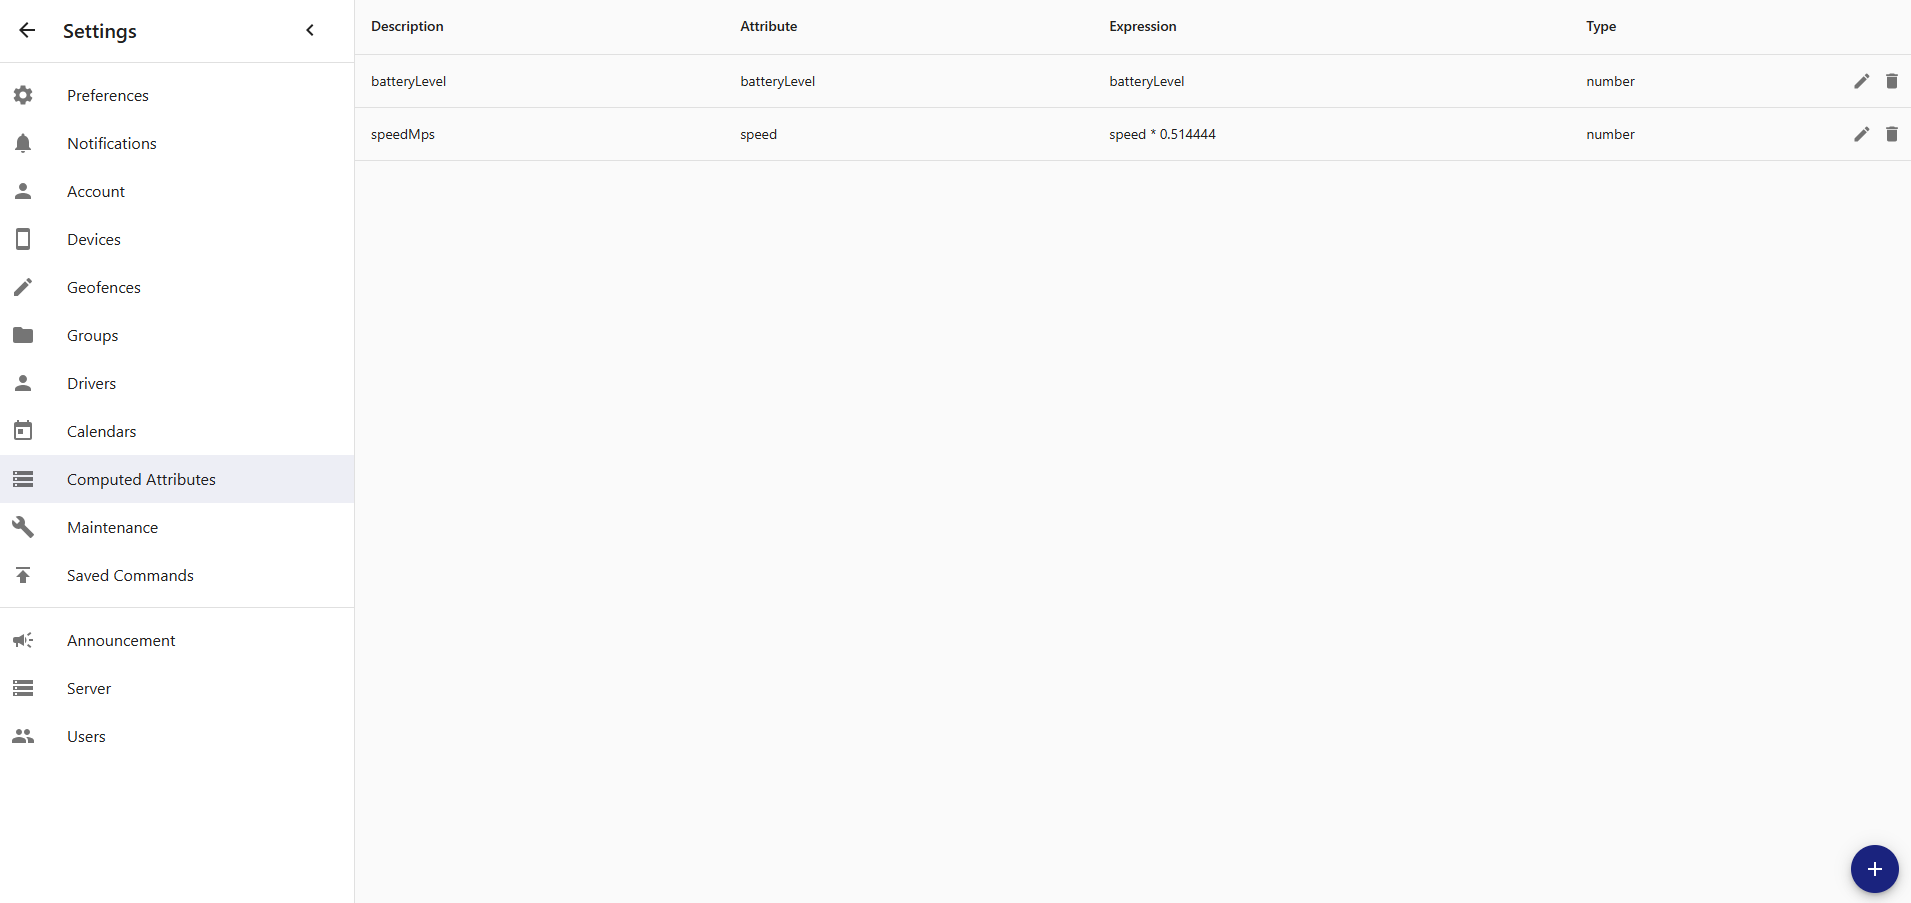
Traccar Server Computed Attributes
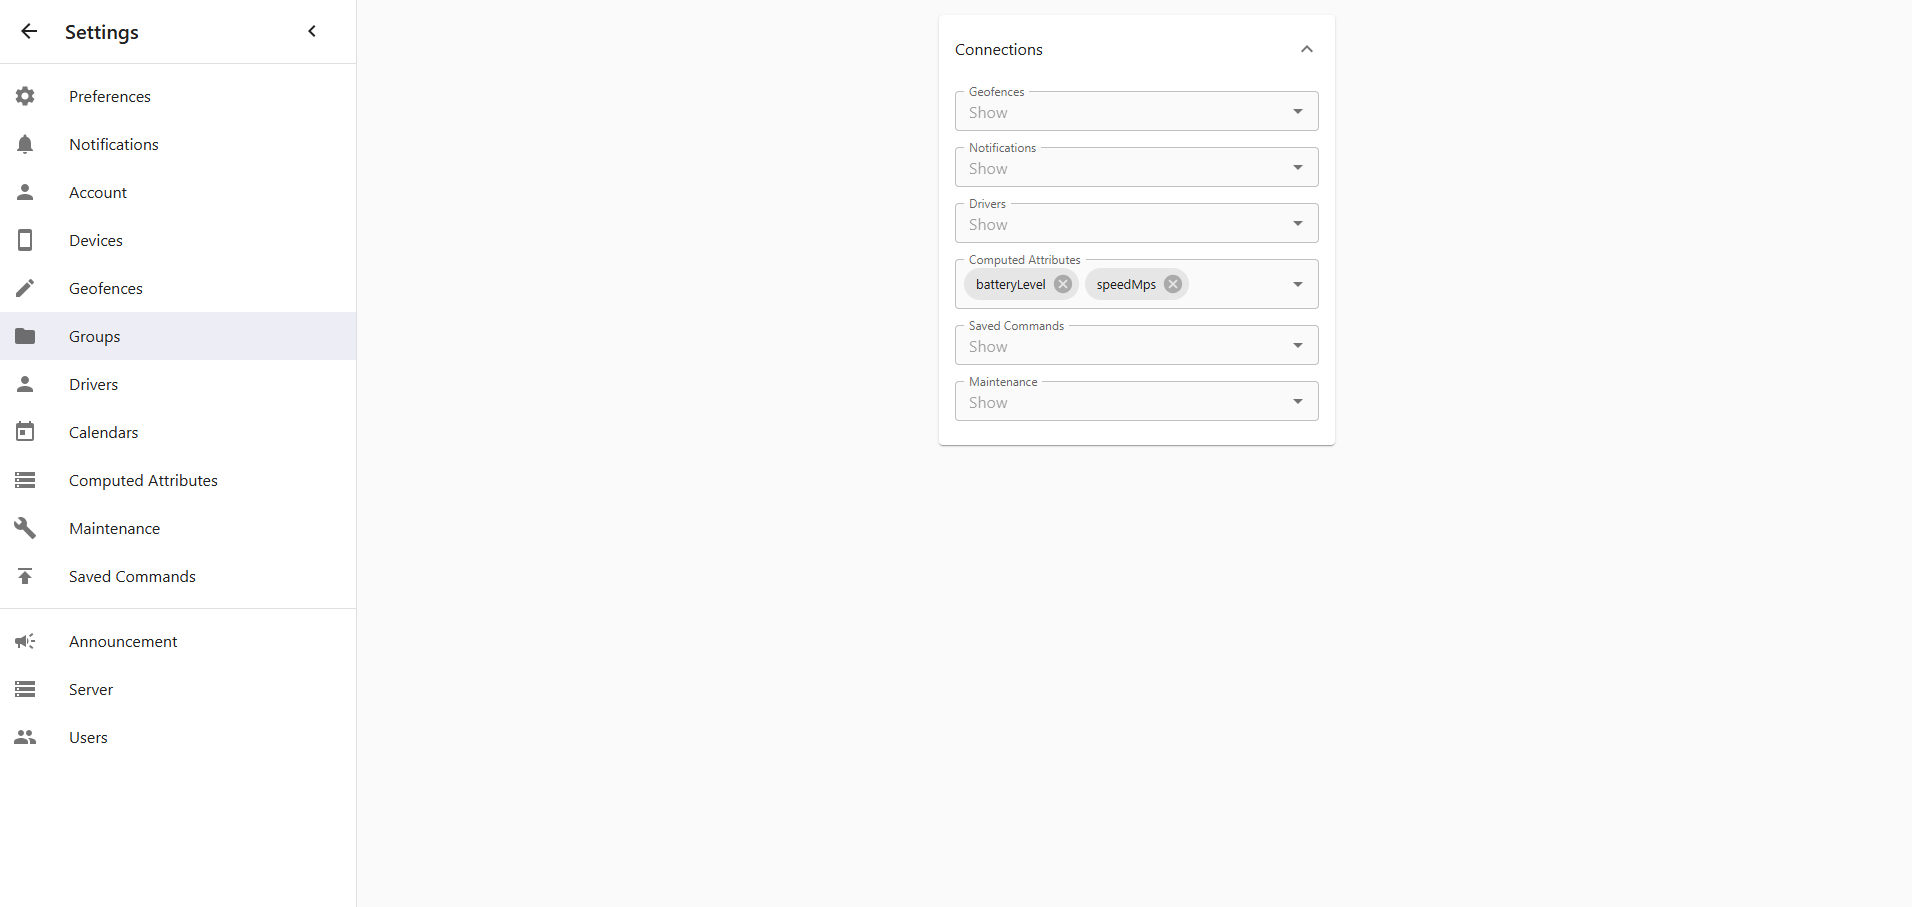
Traccar Server Groups
In "Settings → Devices and Services → Traccar Server → Options" it is necessary to add two Custom Attributes: batteryLevel and speedMps
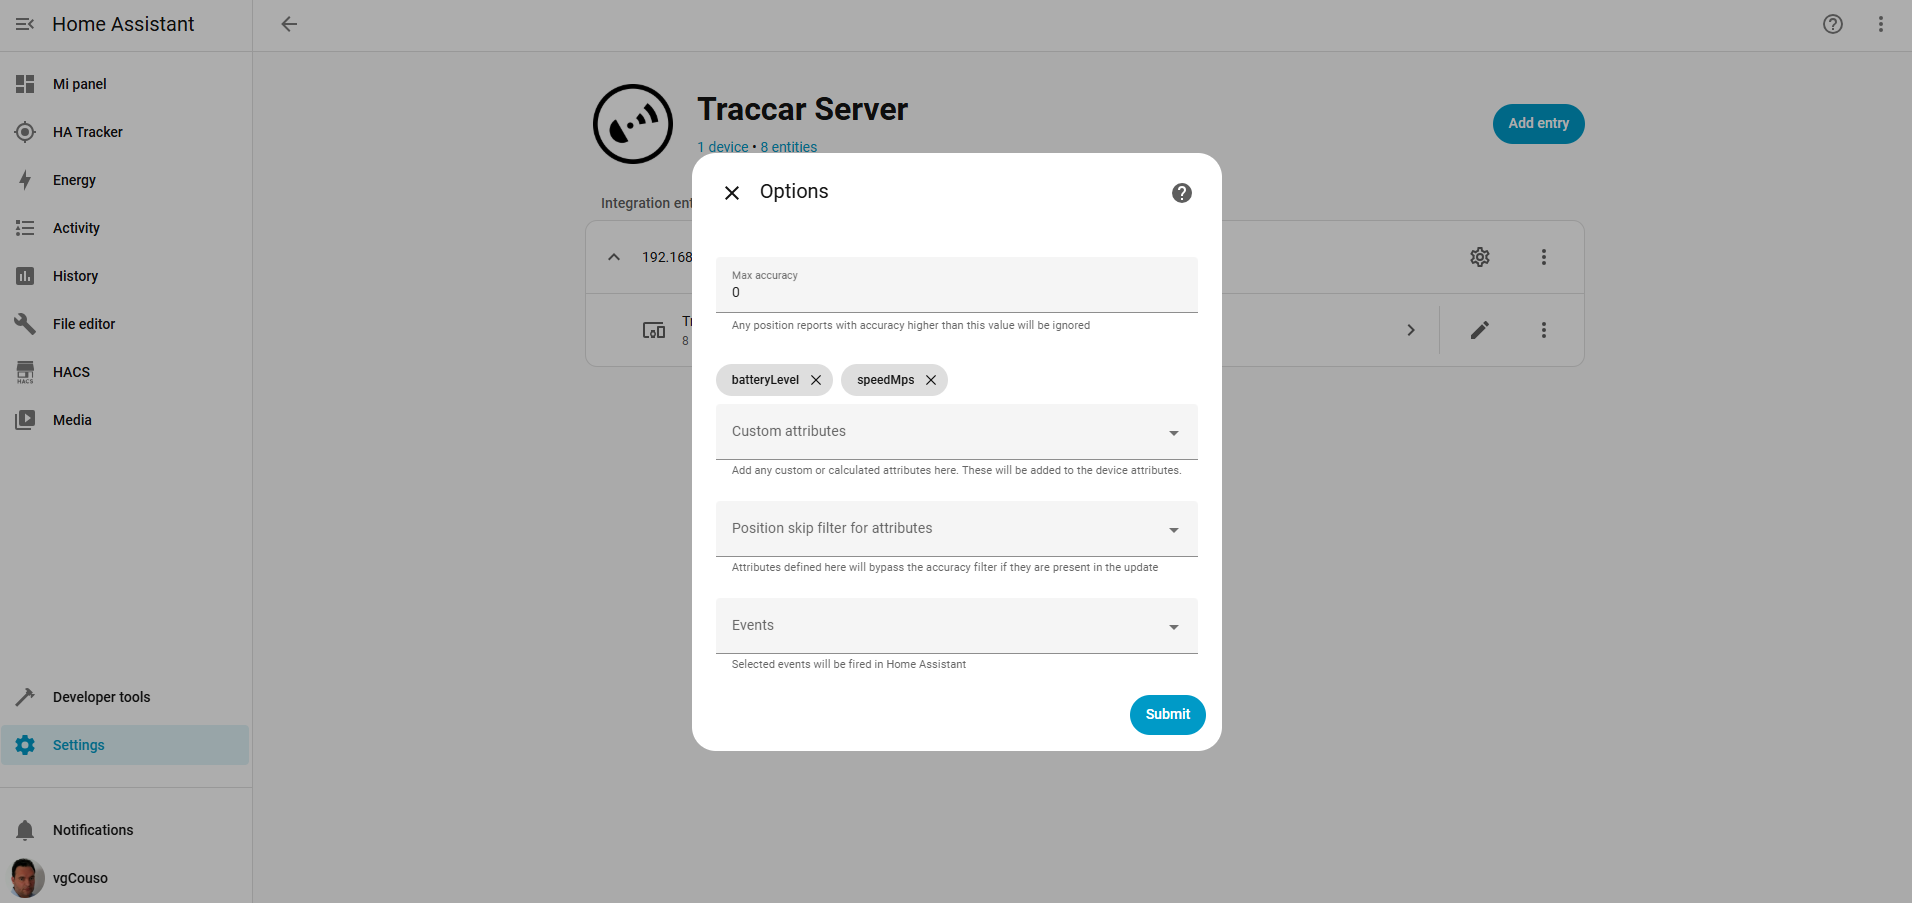
Traccar Server Options
- In Home Assistant, you'll find connected devices under "Settings → Devices & services → Traccar Server"
- Finally, assign the device to a person in Home Assistant: "Settings → People"
QUICK START
3D Map
- When using a mouse, you need to right-click to rotate and tilt. On a smartphone, you can use two fingers.
- It has the following buttons:
Screens
Users
- These are the same ones created in Home Assistant and may have an associated device tracker. In that case, they are displayed on the map.
- If you click on a user on the map, a popup will appear with the information of the last position and a link that directs to Google Maps.
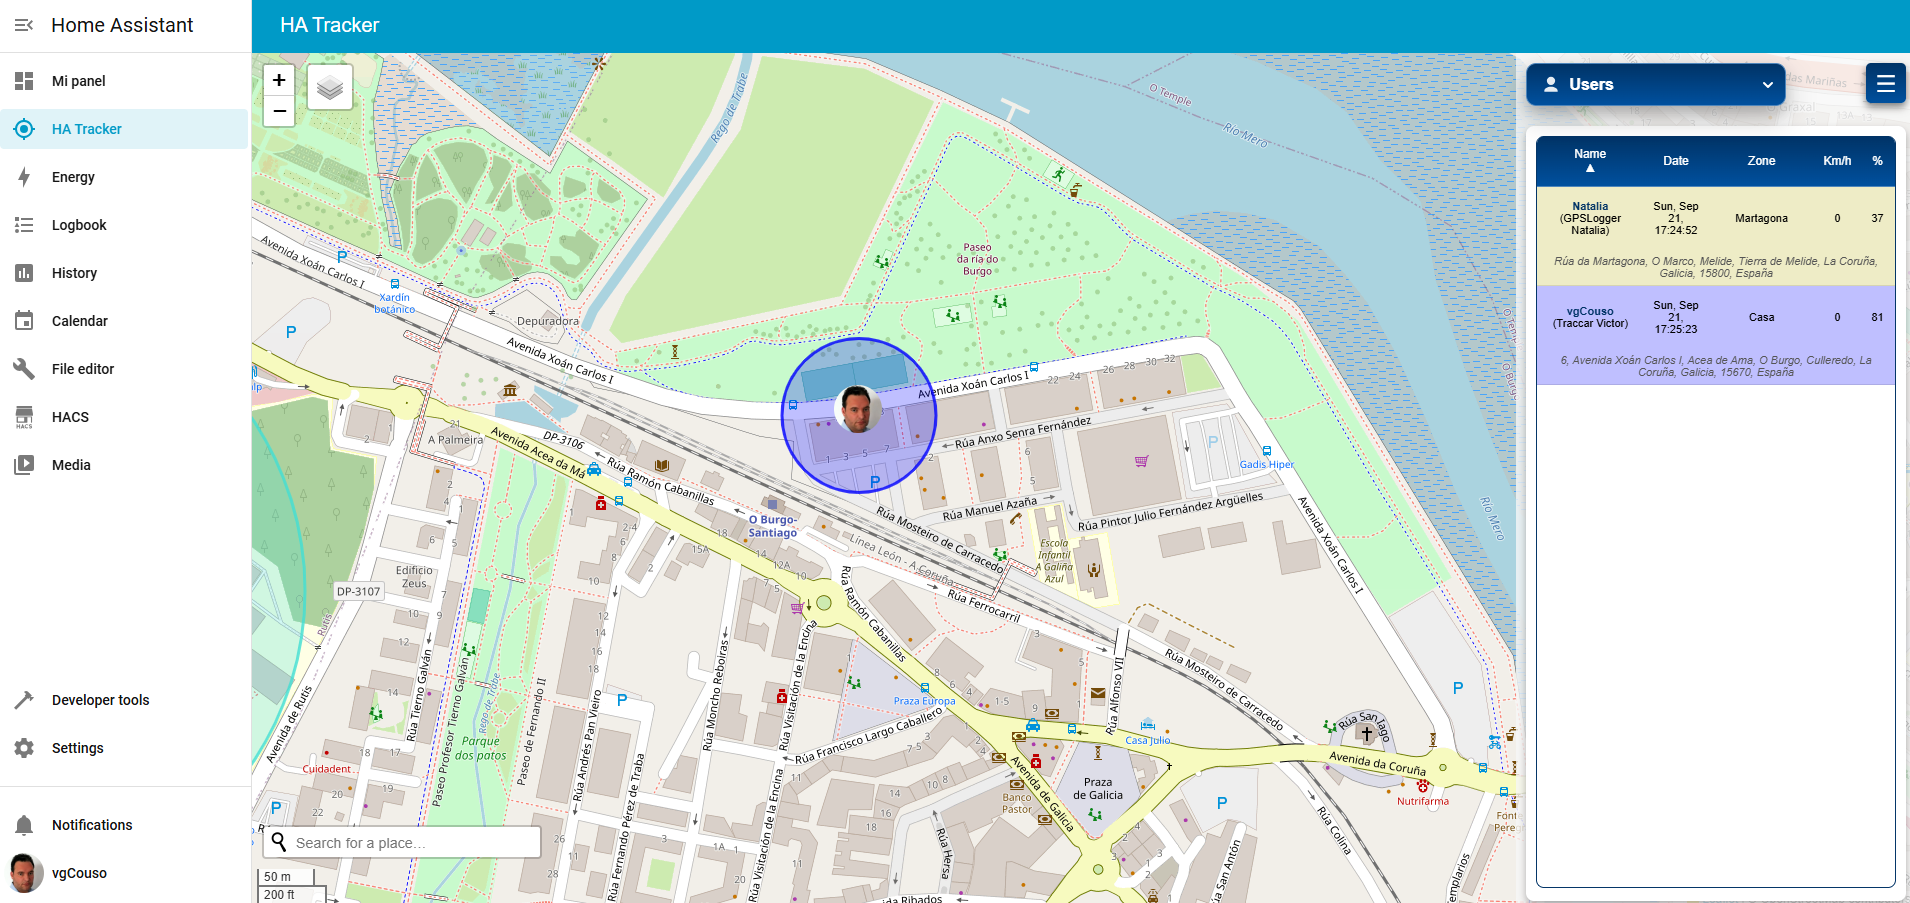
This is the users screen
Zones
- Home Assistant zones:
- Zones created within the application:
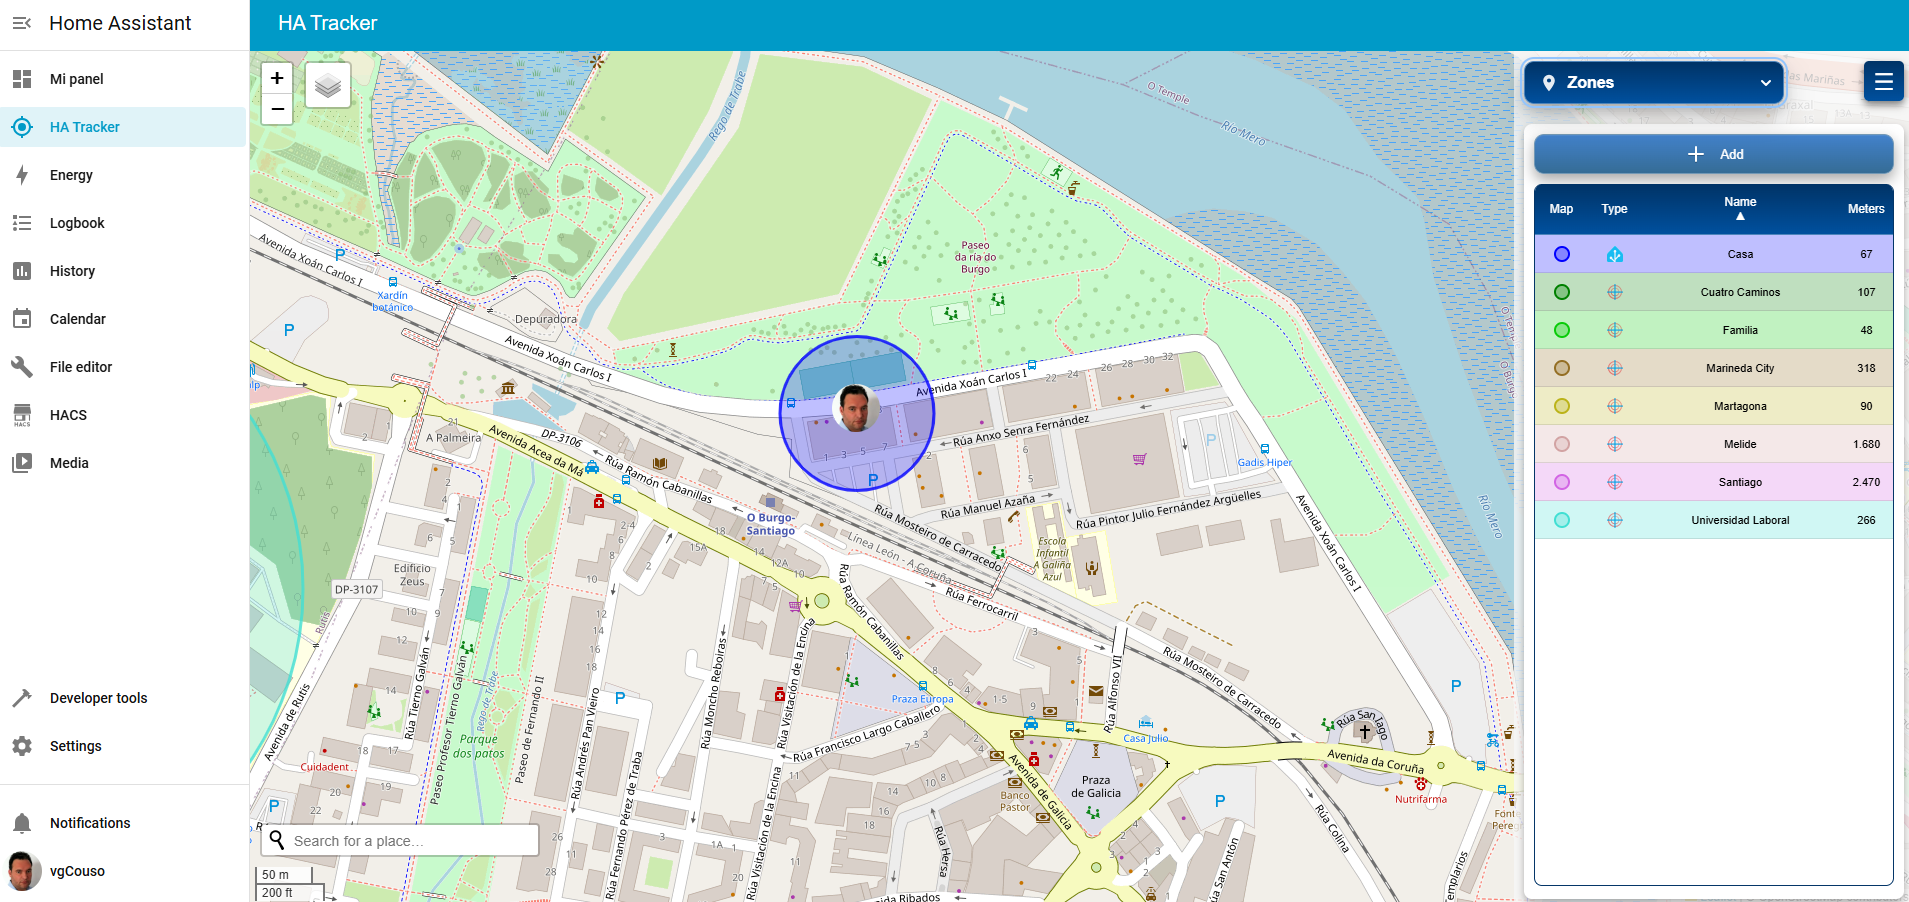
This is the zones screen
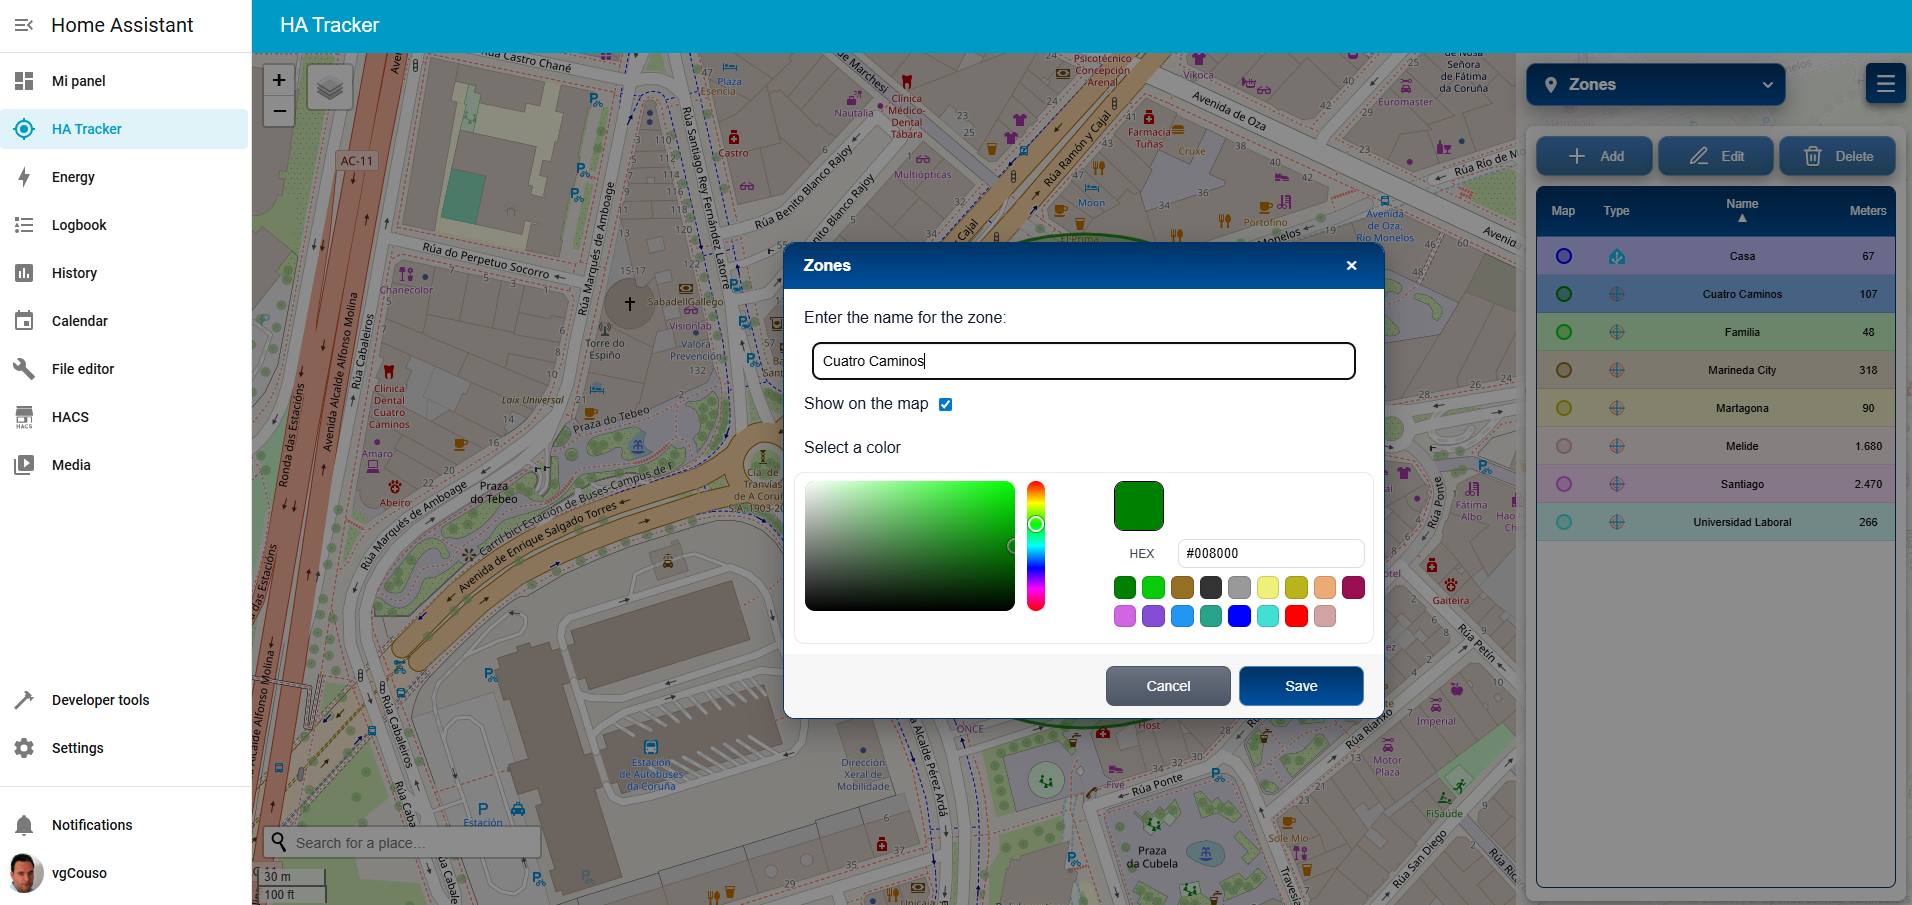
This is the dialog in zones
Filters
A filter applied to a user within a specific date range displays positions grouped by zone and a summary of the most relevant data.
There are three tabs on this screen: - The first tab shows the list of filtered positions grouped by the zone in which they were found. - In the table with the positions they are grouped by the name of the zone in which they are located and can be expanded by clicking on the triangle icon on the left. - You can filter the positions of a group by clicking on the filter icon to the right of the table. - In this table, you'll also see the stops made. To correctly identify them, it's very important to adjust the Speed for stop value in the server options. - The second tab contains a summary of the most relevant statistics for the filter and for each zone visited. - The third tab displays a chart by day, divided into 6-hour segments. - At the top of each chart, the color of the area visited is shown, and at the bottom, it's red if the time has been stopped or green if the time has been moving. Additionally, the speed graph is displayed in dark green. - The position selected in the first tab is shown with a blue vertical line in the chart. - Clicking on the chart takes you to that position within the Positions tab.
On the map, the filter is represented by:
- The route with the filter positions on the map appears in green at the start and blue at the end.
- A Stop icon shows the stops made
- With enough zoom, markers appear that, when pressed, locate the row in the leaderboard.
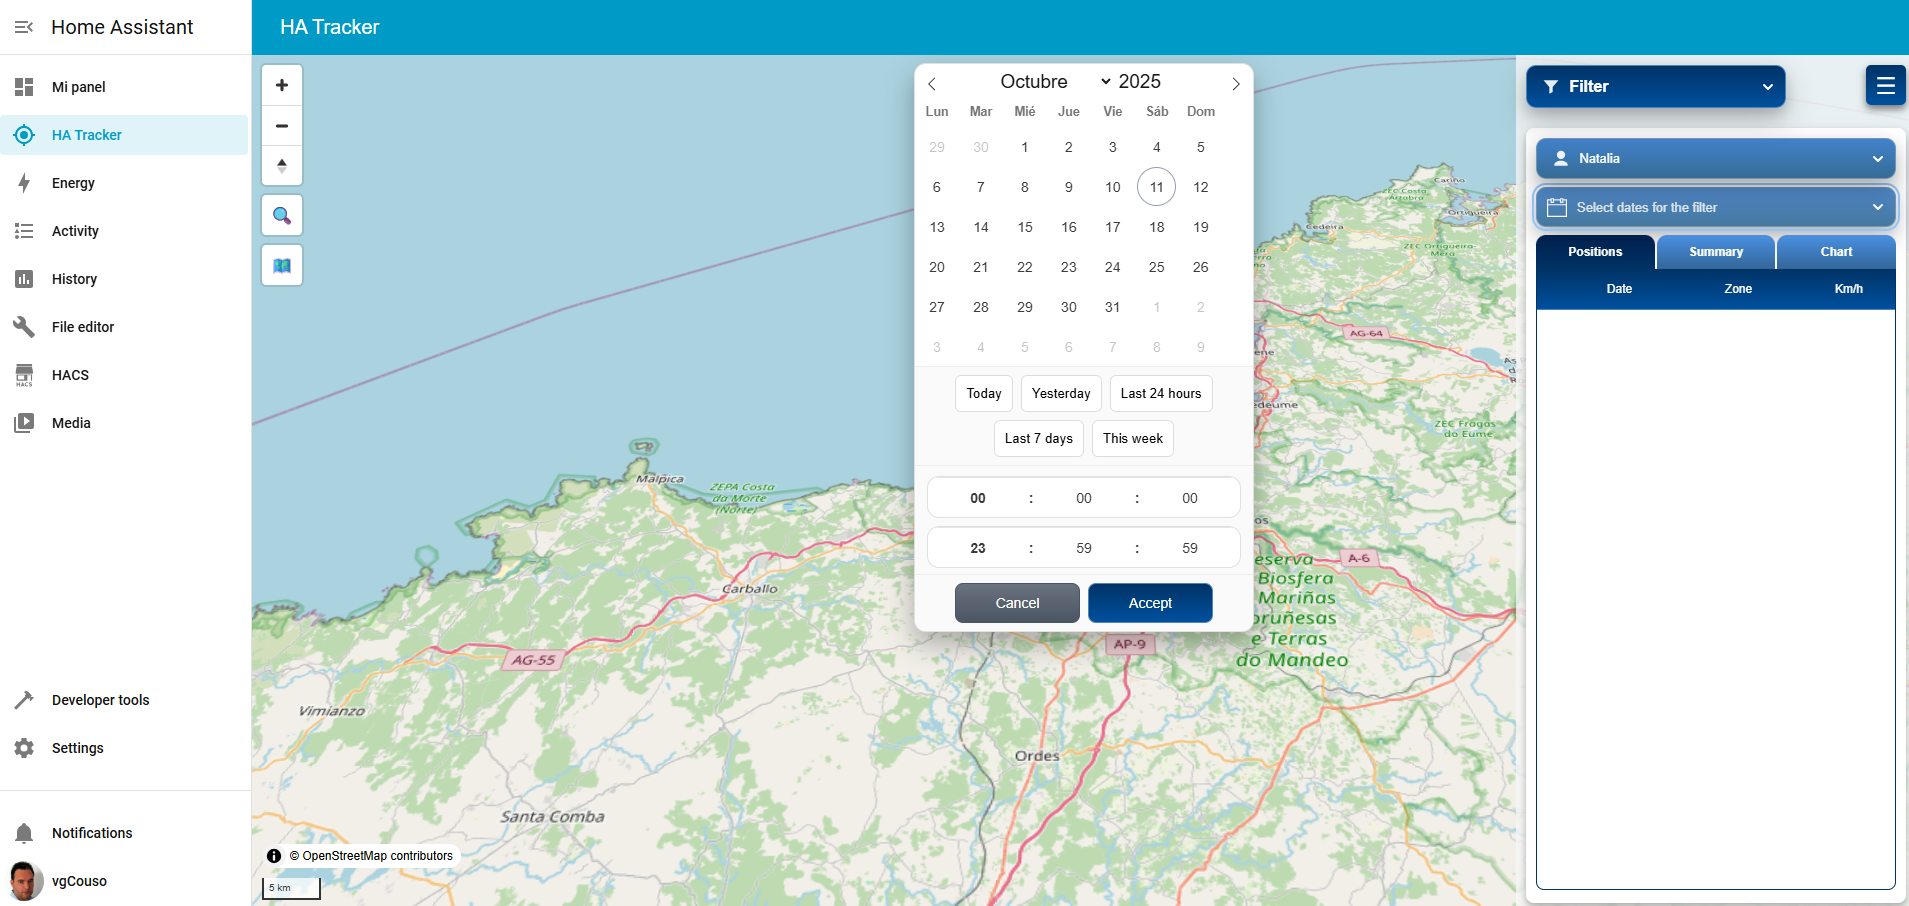
This is the calendar on the filter screen
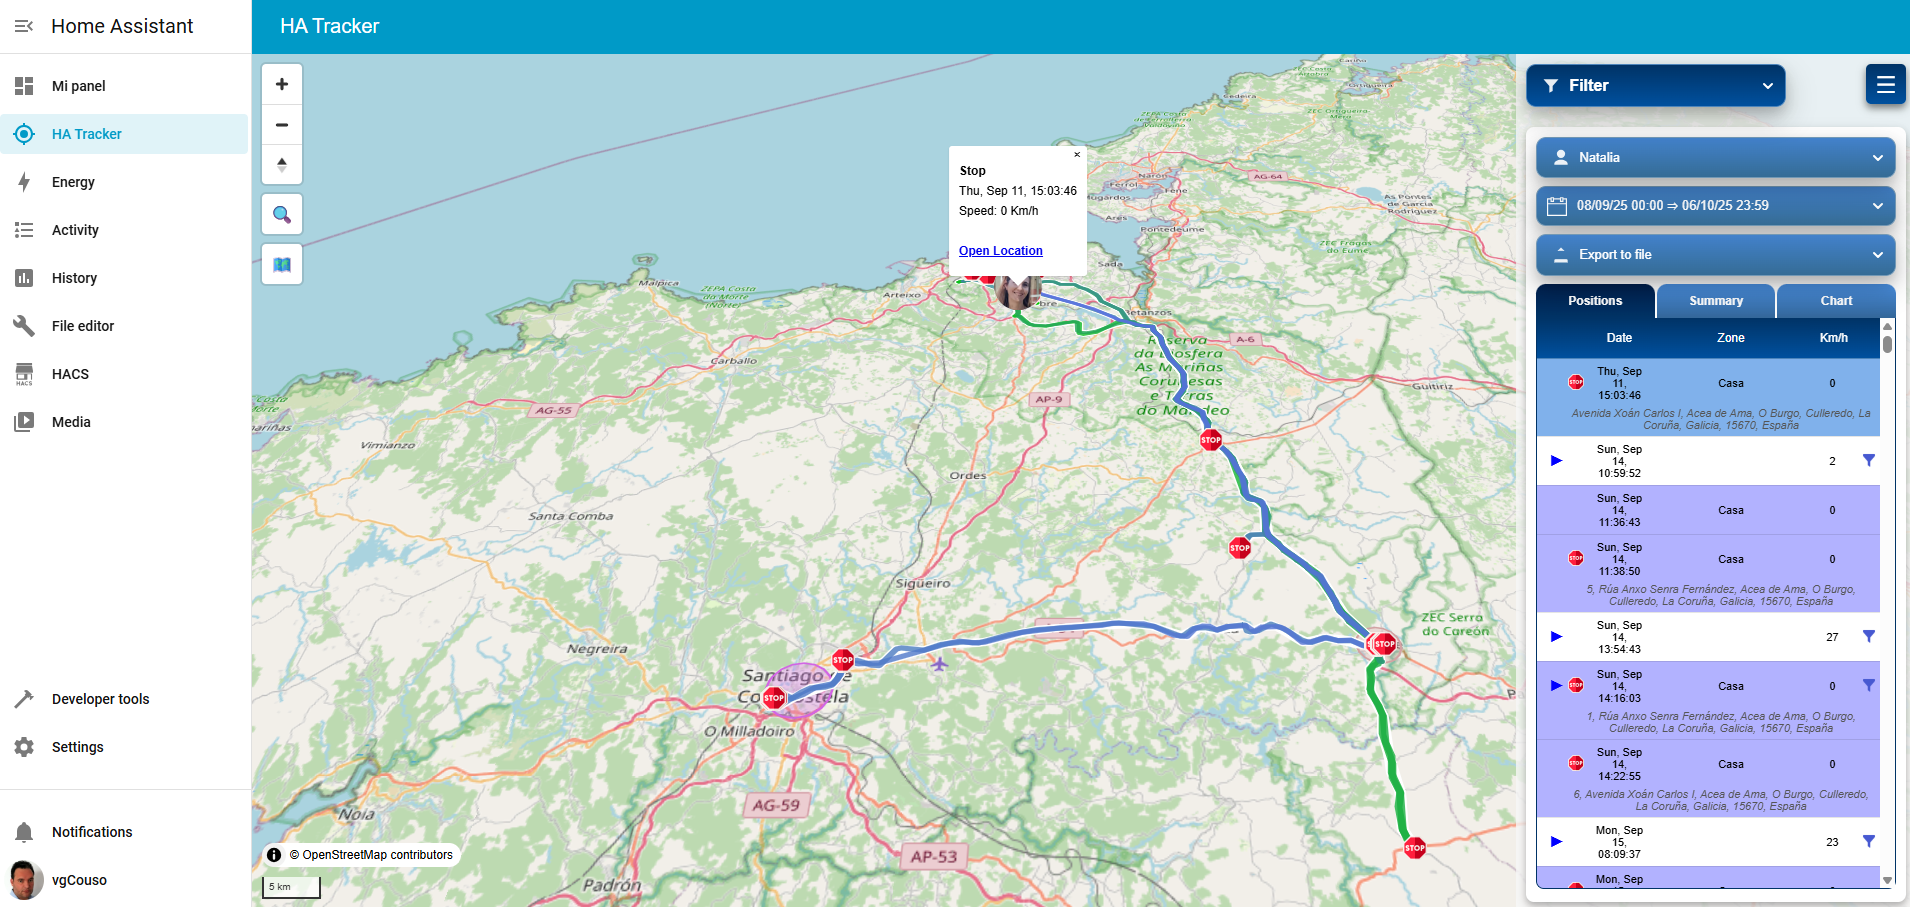
This is the filter with positions screen
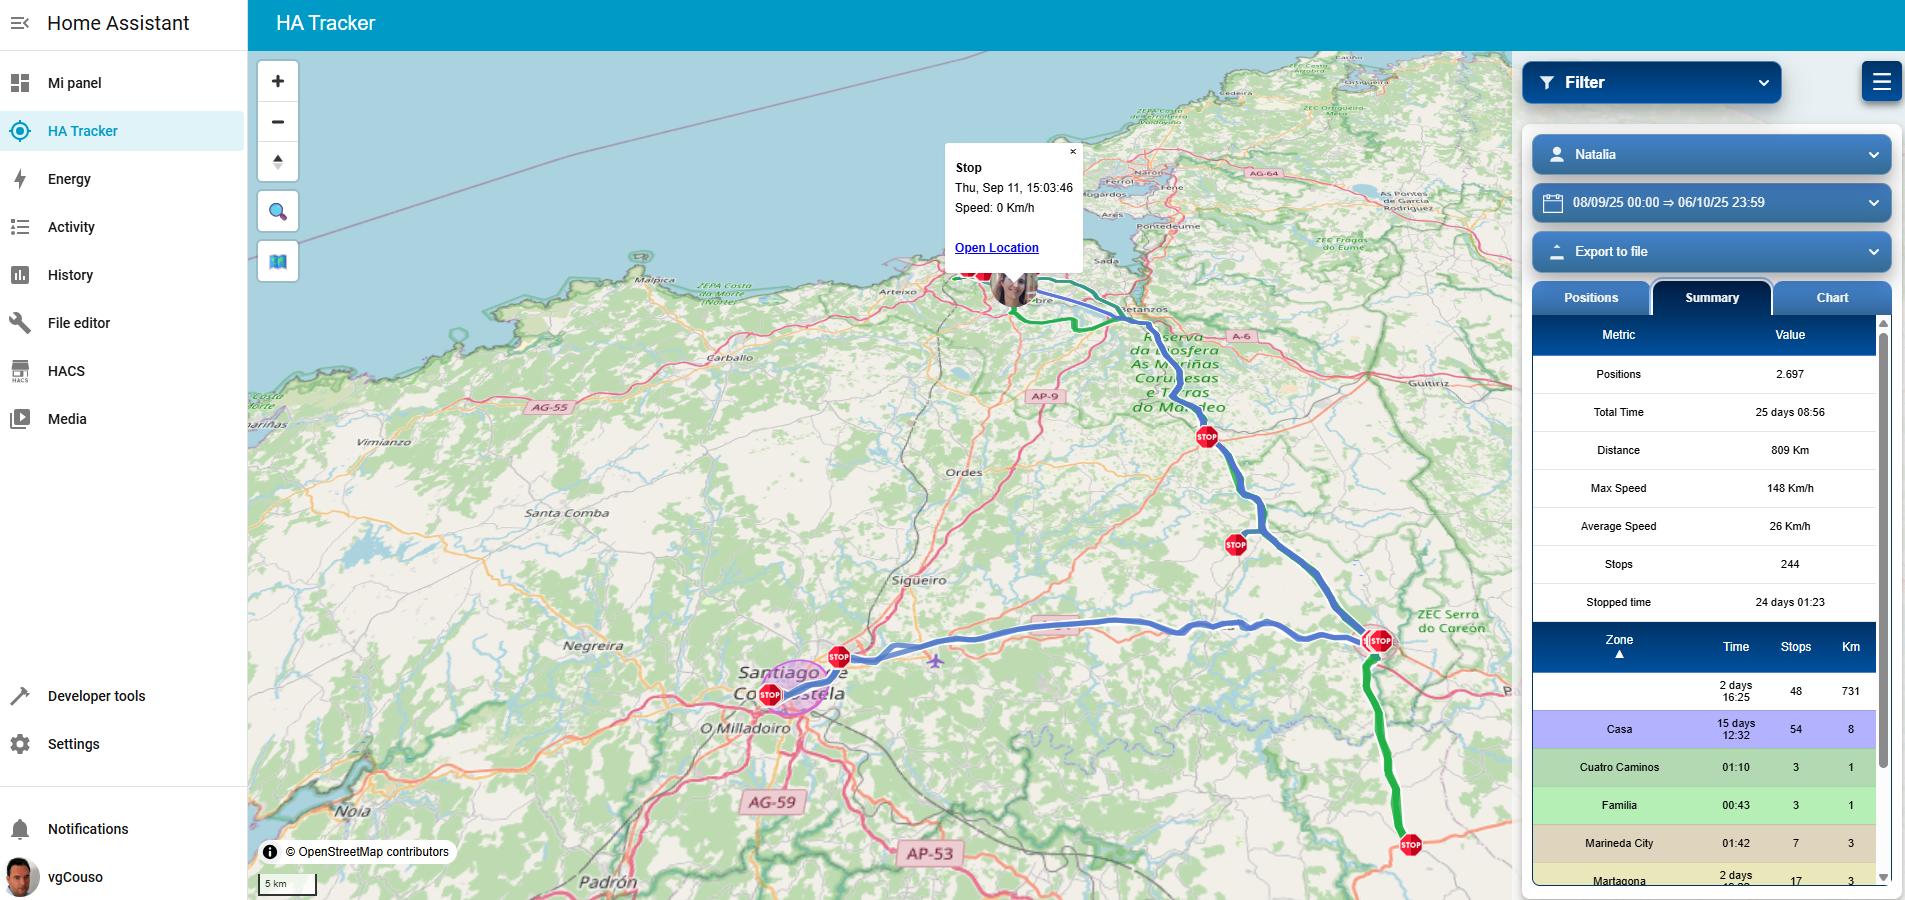
This is the summary screen
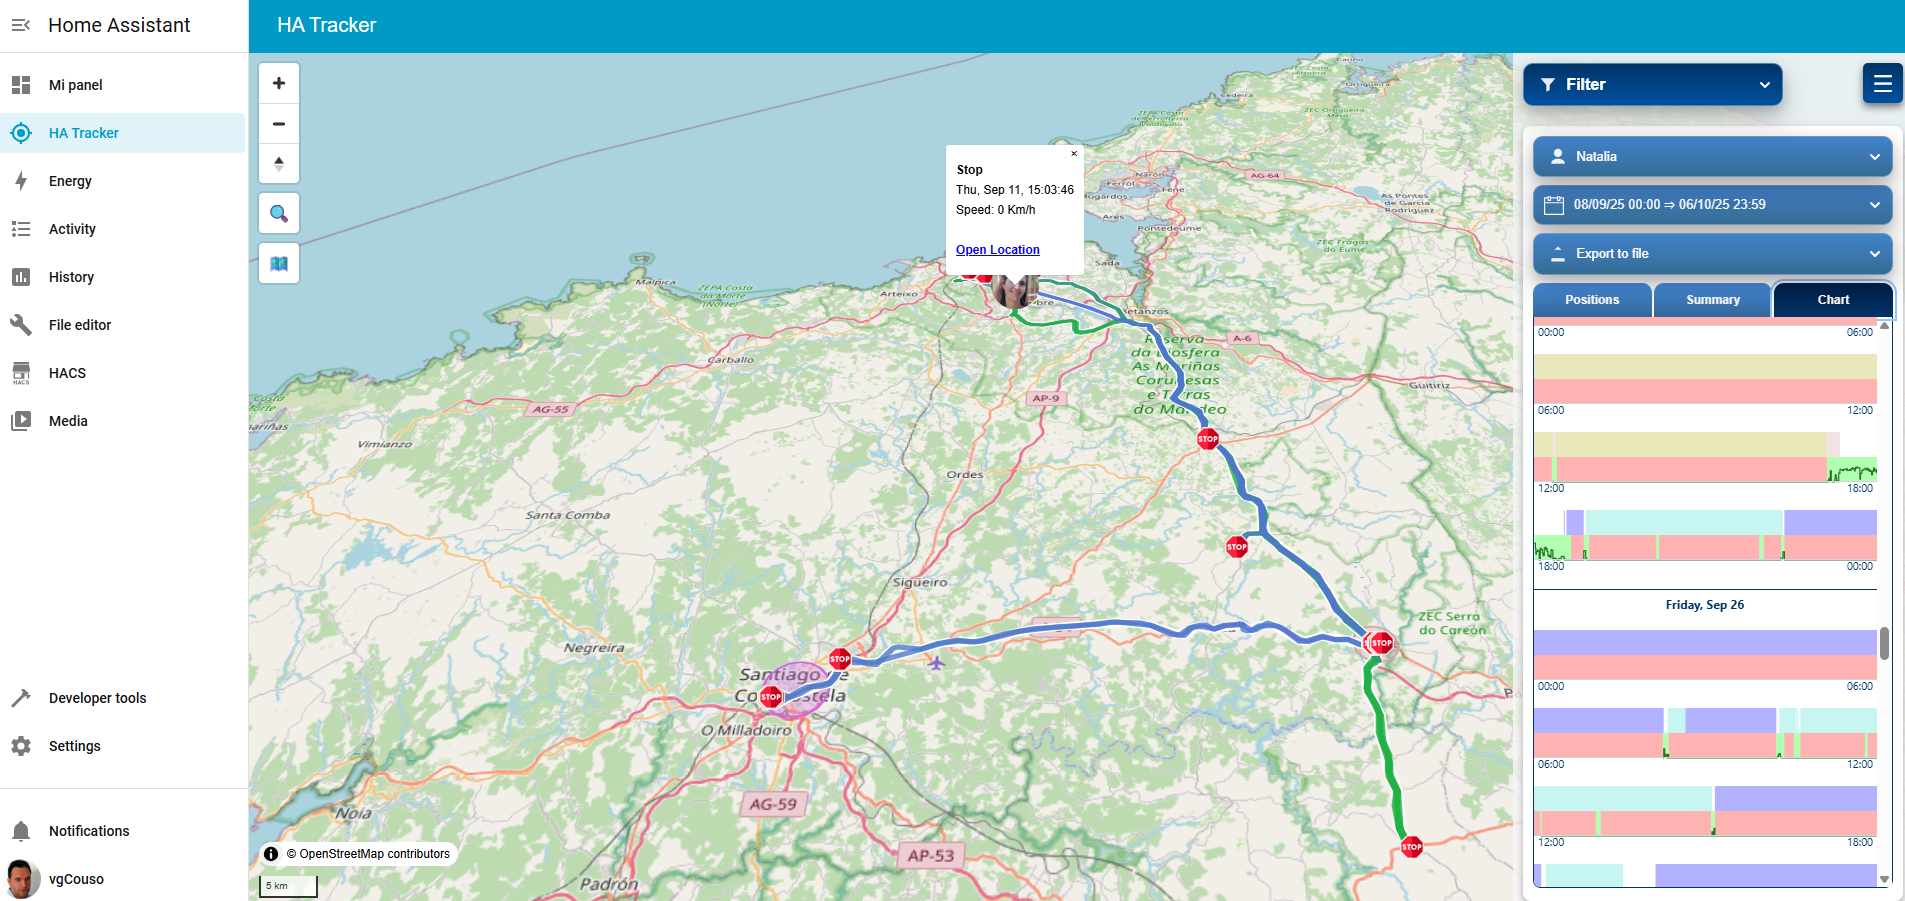
This is the chart screen
ChatGPT
- At the moment GPT for HA Tracker is in beta version
- Due to restrictions set by Cloudflare, which acts as a proxy between GPT and your Home Assistant, the number of requests for all users is limited when using the free version
- You can find the GPT at this link: HA Tracker for Home Assistant
- When you open GPT, it will ask you for your Home Assistant's address, which must be https. Also, you cannot enter HOST names with port
- Once you have logged into the HOST and clicked the "Continue" button, you will be redirected to a screen to log in to your Home Assistant and connect it to the GPT for use.
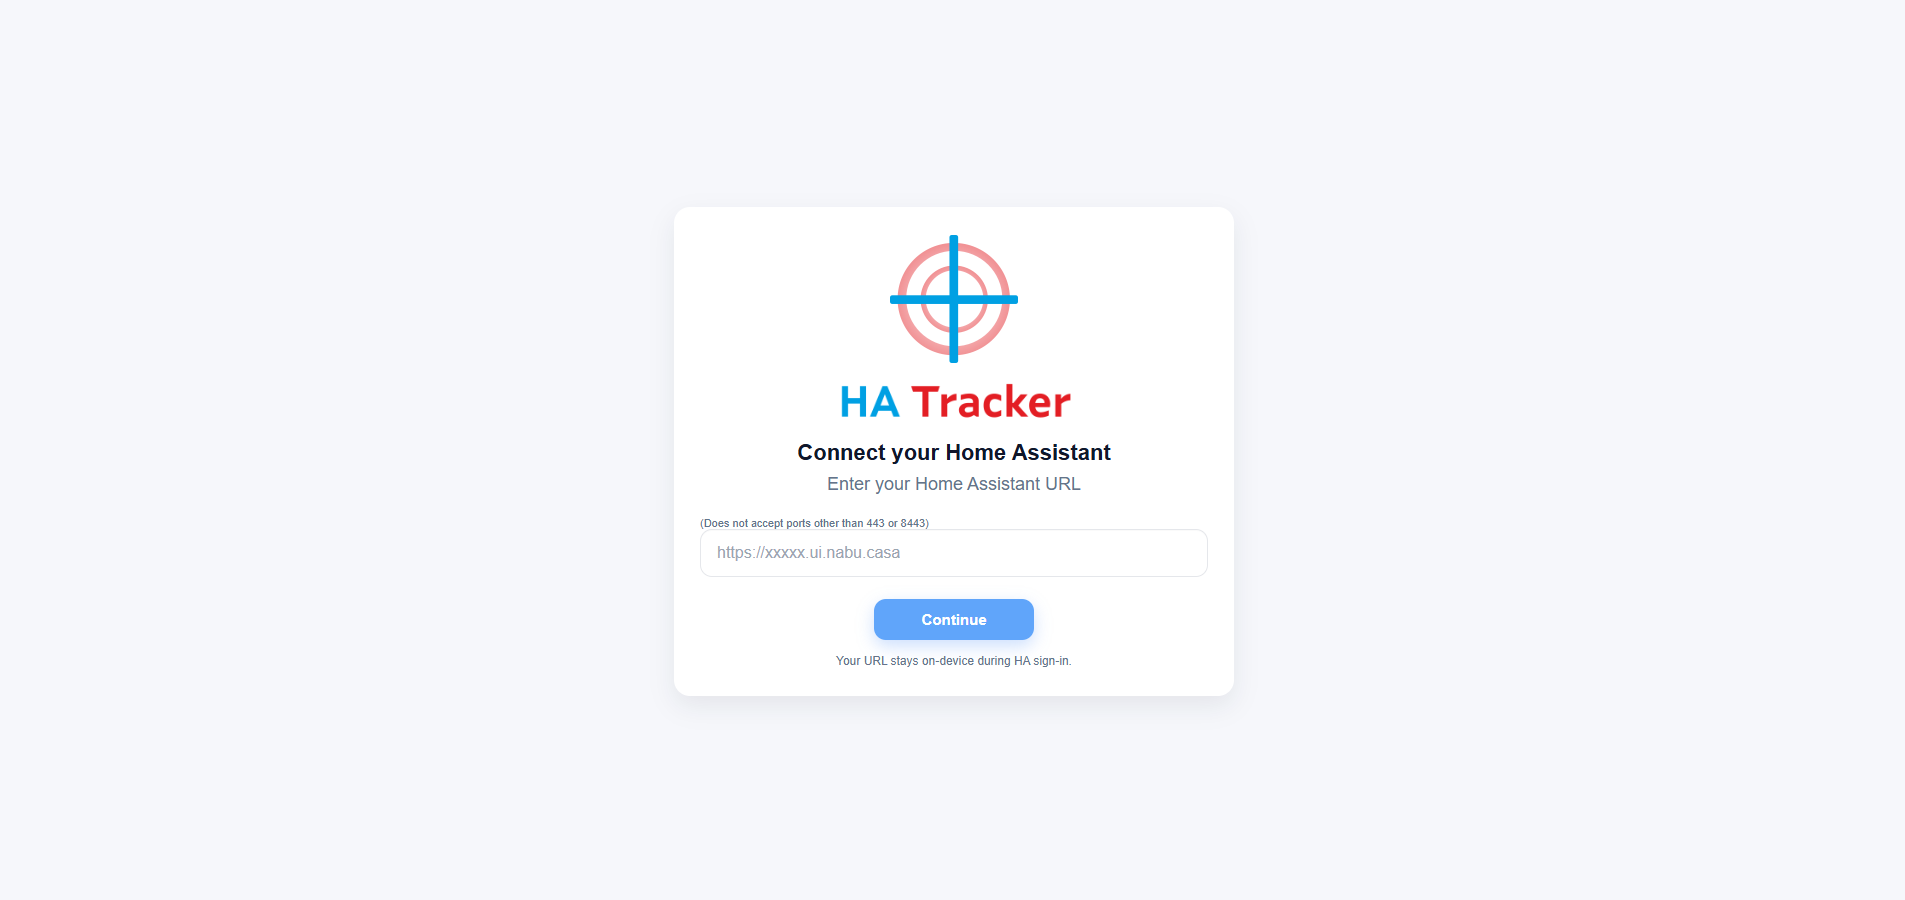
This is the screen to enter the Home Assistant URL
- Within the GPT you can perform a multitude of queries:
Automations
In "Settings → Automations & scenes → Create automation", a new Blueprint is available called: "Persons in Zones Alert (HA Tracker)"
Here you can create new automations that allow you to receive a custom text or voice notification, to the devices you define, when users enter or leave the zones.
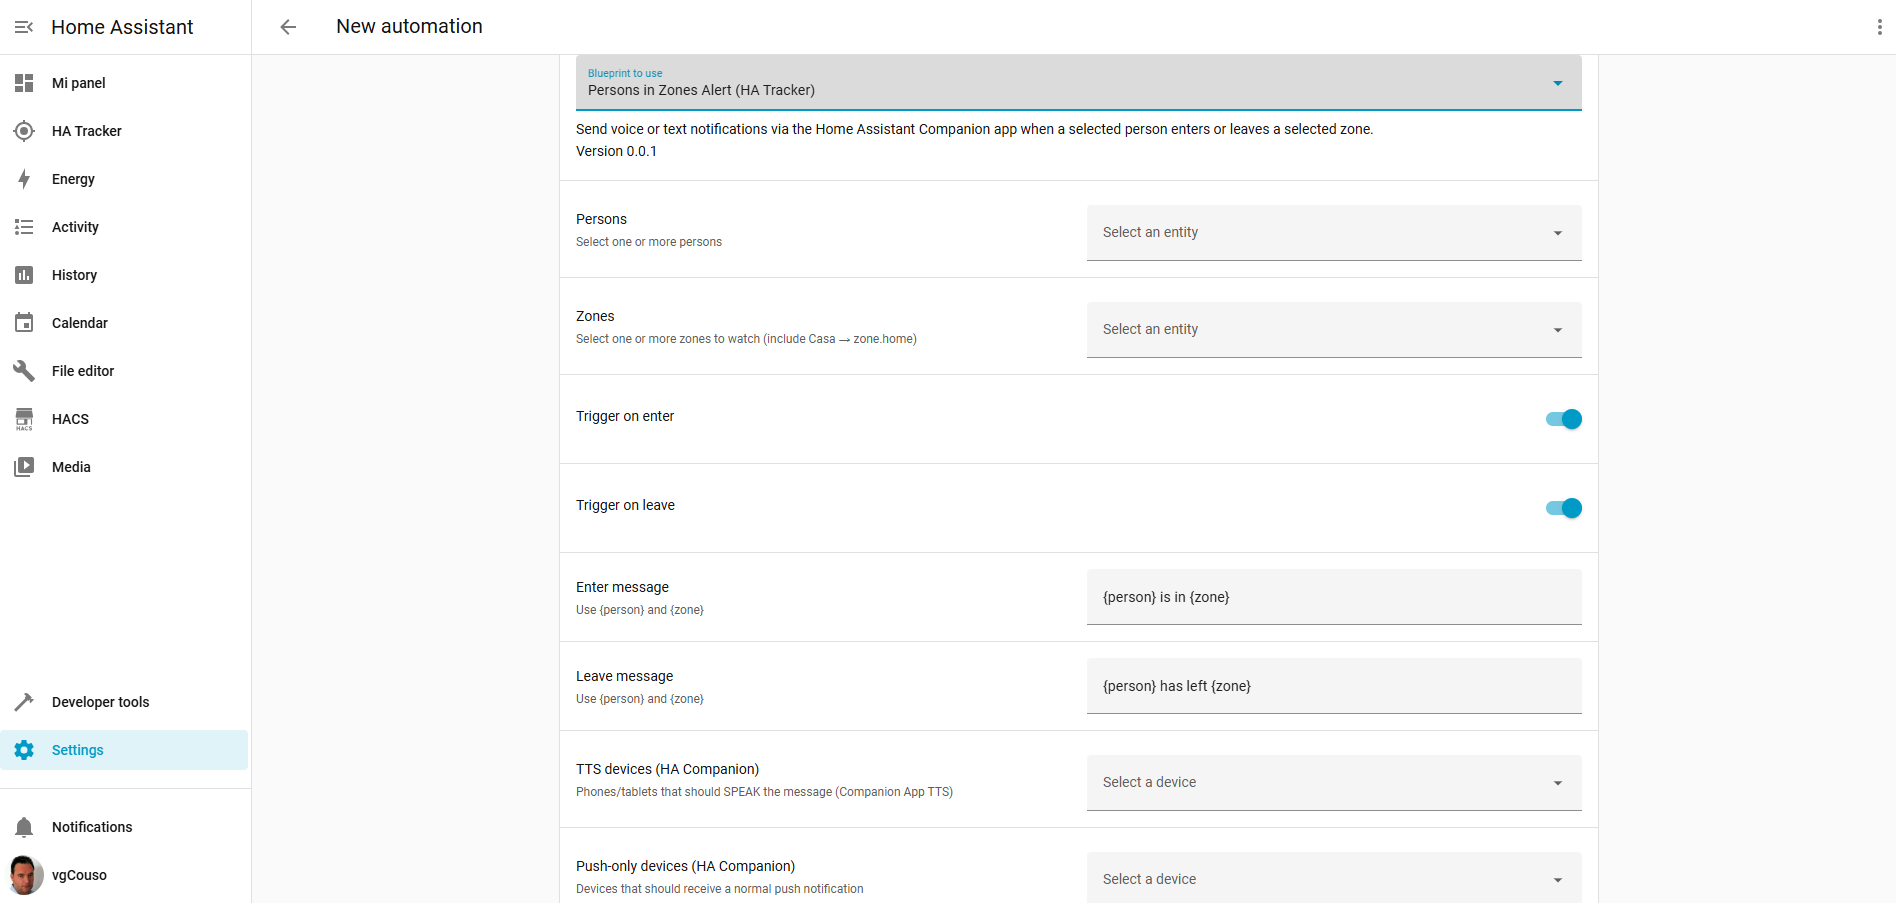
This is the automations screen
CHANGELOG
See the CHANGELOG for details about changes and updates.