
📚 What's it for? | ⚙️ How does it work? | 🌐 Free & OpenSource | 🤝 Contributing
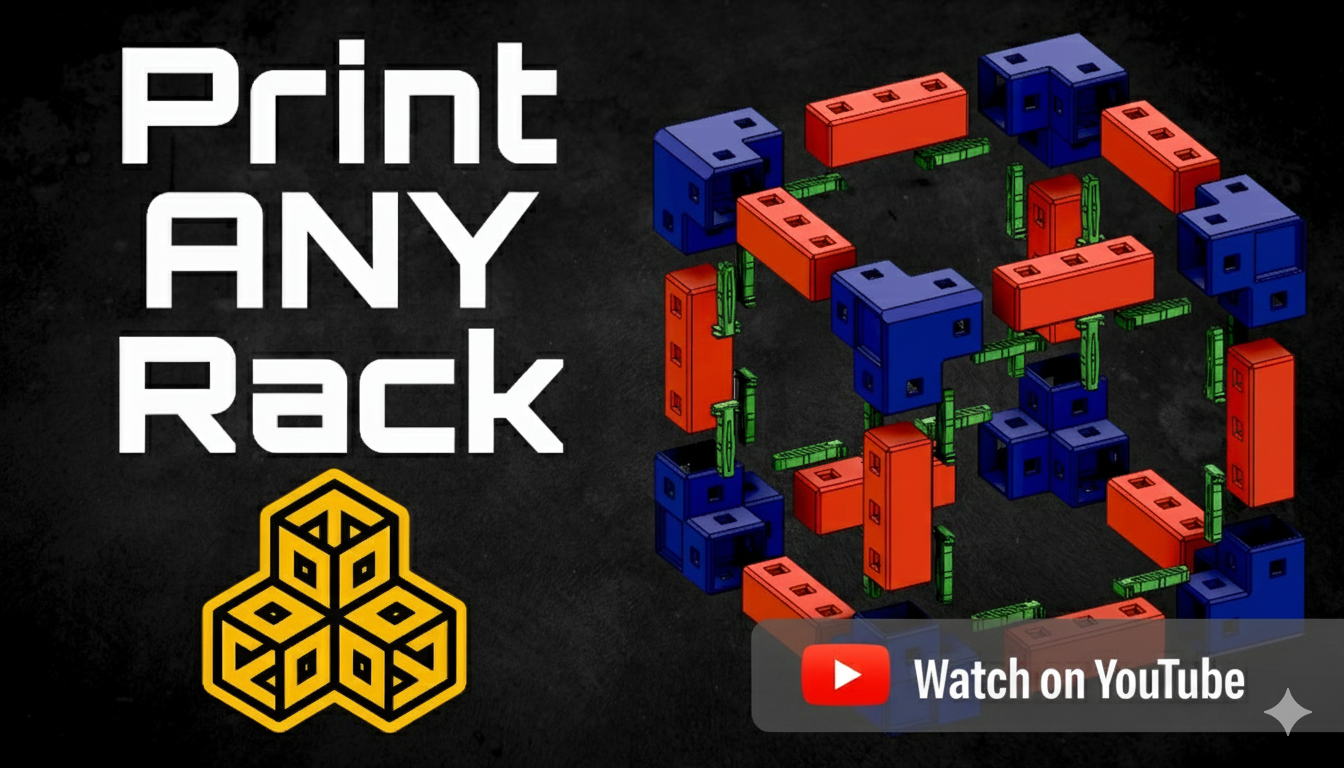
HomeRacker is a fully modular 3D-printable rack-building system for virtually any “racking needs” (server rack, shoe rack, bookshelf, you name it).
You can find all parametric and non-parametric models, as well as the .f3d files (like the HomeRacker - Core), on Makerworld.
The parametric models are available in the HomeRacker GitHub Repository.
💡 Note
The basic HomeRacker system is also referred to as HomeRacker - Core. Free for everyone to use, remix, and reshare.
📑 Table of Contents
- ⚙️ How it works - 🛠️ Assembly Basics - 💡 Assembly Tips - 🖨️ Printing Tips - 🧱 Supports - 🔗 Connectors - 📏 Lock Pins - 🌍 Open Specs - ⚠️ Disclaimer - 🔬 How I tested🔧 Use Cases
I created HomeRacker because I was dissatisfied with the existing solutions available online. Many designs were too specific, accommodating only certain devices owned by their creators. Others supported only the 10" standard, with no flexibility for deviations, often requiring additional adapters.As I began my homelab journey in April 2025, I wanted a modular solution that could adapt and grow with my evolving needs. This would eliminate the need to purchase larger racks or completely change concepts when the original design no longer met my requirements.
As it is my nature to overengineer everything, I came up with a more generic solution to serve ANY racking need. Be it a small rack for a few Raspberry Pis, a 10" standard rack for homelabs, or even a 19" standard rack (still working on that though). You can even create bookshelves, shoe racks, or combine all of the above into an abomination of a rack.
To give you an idea of how this may look (10" rack, half-constructed Pi mini-rack, bookshelf):
Aside from the basic building blocks, the rack above also contains the following parts:
- 10" Rack
- Shelf (Build any shelf configuration you like.)
✨ Features
The HomeRacker - Core features:
- Fully modular: Thanks to the support-connector system, you can scale in any direction. The only limits are material strength and how much money, space, and time you have.
- 3D-printable: The entire core system is printable, and no tools are required for assembly.
- No supports needed: Not a single part of the core system needs printed supports.
- OpenSource: Build your own adapters and use the system in personal or commercial projects (see 🌍 Open Specs and 📜 Licensing for details).
⚙️ How it works
tl;dr Think of a rack shape you want to build, download the Core model on MakerWorld (or customize it there or from this repo), print it, assemble it, and add your own mounts/adapters/whatever-you-like.
I might post a YouTube video here to show how it works.
🛠️ Assembly Basics
Assembly is straightforward and requires no tools:
- Prepare the components: Download the HomeRacker - Core (or customize it on MakerWorld / from this repo), and print all required parts. Clean off any debris.
- Connect supports and connectors: Attach connectors to supports based on your desired configuration.
- Secure with Lock Pins: Use Lock Pins to lock parts in place. They can be inserted horizontally or vertically thanks to their square profile.
- Add features: Attach panels, shelves, and other accessories as needed.
💡 Assembly Tips
💡 Pro Tip: I created a sample 10" Cyberpunk-themed 3D model on MakerWorld for inspiration.
- Plan ahead! Otherwise, you'll end up with an army of unused parts like me:
Make a parts list, or let the Configurator count for you:
* How many supports of what lengths (in base units)?
* How many connectors of each type (pull-throughs, feet, regular)?
* Print a ton of Lock Pins. You'll need more than you might think. The Core model on MakerWorld includes a 100-pin plate and a Gridfinity box for storage.
- Build layer by layer: Start with the base frame, add vertical supports, then stack intermediate/top frames.
- Make sure Lock Pins are fully inserted. Gentle force might be needed.
🖨️ Printing Tips
- If bed adhesion is sketchy: Add a brim to the supports. The small contact surface on connectors can cause print failures.
- Prevent warping: Keep the print bed clean and oil-free. Even a fingerprint can cause issues.
- When printing new filament: Make sure to calibrate the material flow!
📐 Tech Specs
💡 Note - For actual dimensions, check out the original Fusion .f3d files on Makerworld. All designs are fully parameterized for easy scaling.
The system is based on 4 core measurements:
- 15mm: The
base_unit. Each support has 15mm x/y dimensions, with z being a multiple of 15mm. - 4mm: Side length of Lock Pins and matching holes.
- 2mm: Wall thickness of connectors.
- 0.2mm: Tolerance added to connector interiors for print/material variances.
These values (except tolerance) are arbitrary and just made sense during design.
🧱 Supports
Supports are the structural spine of HomeRacker.
Height is a multiple of 15mm (base units). E.g.: A 3-unit support = 45mm tall, a 17-unit = 255mm.
Each unit height includes a 4mm hole for a Lock Pin.
- Holes match Lock Pin dimensions (no tolerance).
- Holes are convex on x and z axes for multi-directional insertion.
Front View !Support Front View
Side View !Support Side View
Top View !Support Top View
🔗 Connectors
Connectors join supports in 1 to 3 dimensions. From straight extenders to 6-way junctions.
Types:
- Standard: Solid center; best for load-bearing.
- Pull-Through: Open center for complex builds (e.g. 10" rack).
- Feet: Solid end pieces; used as rack feet.
❗ Important
Connector centers are always 1 base_unit in height. No offsets, no fluff.
So: 2 × 3-unit supports + 1 connector = exactly 7 base units (105mm).
Schematics:
Top View, Outer !Connector Outer Measurements
Top View, Inner !Connector Inner Measurements
📏 Lock Pins
Lock Pins hold the system together.
They rely on tension from their convex shape to stay in place.
Schematics:
Top View !Lock Pin Top
Side View
Don't ask why the height is 3.791mm, it works. I left it as-is.
I may tweak the pin grip in future versions to make it easier to pull out again. But the base dimensions will remain the same for compatibility.
💡 Tip: Pulling out Lock Pins one at a time can be tedious. Check out the Pinpusher, a tool designed to push Lock Pins back out quickly, especially when removing several at once.
🌍 Open Specs
I created HomeRacker - Core to be an open spec that any maker can build on, with (almost) no strings attached. (See 📜 Licensing for more.)
I encourage you to make your own models based on HomeRacker! Let me know, and I’ll feature your work on this page and cross-link it on Makerworld (subject to my "very objective" approval 😄). Just create an issue if you want to be featured.
💡 Want to contribute new features or extensions?
Head over to the HomeRacker Community Repository!
This core repo focuses on the base system and accepts primarily bugfixes. New modules, adapters, and creative extensions live in the community repo.
💬 Community
Got questions? Want to share your builds? Join the HomeRacker community!
- 🐙 Community Repo: Contribute new features, extensions, and modules
- 💬 Discord: Chat with me and other builders, get help, share ideas
- 🎥 YouTube: Watch build guides, tutorials, and project updates
- 🖨️ Makerworld: Grab ready-to-print models and remixes
❓ Why the name?
After ~4 hours of research, I found all my original ideas (UniRack, OpenRack, etc.) were taken.
So, "HomeRacker" was born, part practical, part tongue-in-cheek. It fits the homelab theme, but also hints at the "home-wrecking" time sink this can become.
📜 Licensing
💡 tl;dr
Use it for ANY purpose (even commercial), but credit me and share alike!
- Source code:
MIT License(LICENSE) - 3D models & creative assets (
/models/):CC BY-SA 4.0 License(/models/LICENSE)
❗ Important
Other models I publish may have more restrictive licenses. This will be stated clearly on Makerworld.
HomeRacker is an unregistered trademark of Patrick Pötz, first used publicly on 12.04.2025.
🛠️ Developer Tools
HomeRacker includes custom tooling to streamline development:
- scadm - OpenSCAD + library dependency manager
pip install scadm → scadm
- Manages dependencies from scadm.json
- Setup OpenSCAD Action - Reusable GitHub Action for CI
uses: kellerlabs/homeracker/.github/actions/setup-openscad@setup-openscad-v1
- Style Guide - colours from
constants.scad, Orbitron Black + Source Code Pro, layout rules
- Site - homeracker.org, built by Astro from the READMEs in this repo
README.md and models/*/README.md
- Relative links and render images are resolved at build time
- Configurator - Web-based rack planner with parts list
- Renovate Preset - Automated dependency updates
"extends": ["github>kellerlabs/homeracker:renovate-dependencies"]
See CONTRIBUTING.md for setup instructions.
🚀 Releases
Releases are fully automated:
- Automated versioning: Follows Semantic Versioning based on Conventional Commits
- Changelog generation: Automatically generated from commit messages
- Release schedule: Weekly auto-merge of release PRs (Mondays) or manual trigger
- GitHub releases: Tagged releases with changelog and version information
- PR validation: Pull request titles are validated to ensure Conventional Commits compliance
To contribute and trigger releases, use conventional commit messages. See CONTRIBUTING.md for details.
🧪 Tests
Of course I tested stuff... It took ~4 months from idea to this release. Look at all the prototypes: !Photo showing a variety of HomeRacker prototypes lined up
⚠️ Disclaimer
⚠️ Warning
This project is provided “as is,” without any warranty. Use at your own risk. I’m not responsible for damage, injury, or loss caused by using this system or its parts.
Aside from the scary warning above, I need to mention, that due to the high modularity of this system combined with limited time and resources I was of course not able to test every combination of filaments, printers, print-settings, room conditions (temperature, humidity) or to do extensive load-bearing tests.
What I want to say: I feel like the model turned out to be really nice and versatile. That's why I shared it in the first place. But since I do not have control over the manufacturing conditions of any consumer of this model, I cannot give any guarantees on how your specific print will turn out in the end. There are just too much variables which not even the best model design can compensate for. (Writing this feels a bit like an upfront apology... seems like I'm a people pleaser)
🔬 How I tested
My setup is as follows:- a room temperature between 17 and 25°C
- Humidity levels between 29% and 36% (depends on when I'm doing my laundry)
- A BambuLab X1C printer
- Exclusively BambuLab filament (haven't tried others yet)
- mostly I used the Textured PEI plate. It just works (provided you regularly clean it using Isopropyl alcohol). For the rest of the time I tried out the Cold Plate Super Track (it's nice but very hard to get your prints off the plates when it cools)
🛠️ Btw: I am not affiliated with Bambu in any way besides uploading my models to MakerWorld and occasionally making use of their Exclusive Model program. But they don't pay me for naming their products anywhere else (I wish 😉).