
Strava integration for Home Assistant (Unofficial)


The unofficial Strava intregration for Home Assistant. Adds a custom component to integrate Strava activity data into Home Assistant.
Support this project


Important Notes:
⚠️ Strava subscription required from 1 July 2026
Strava now requires a paid Strava subscription to use the API as a Standard Tier developer. Without an active subscription, the integration will stop receiving updates after this date. Visit your API settings dashboard to check your subscription status.
When configuring the Strava API, the Authorization Callback Domain must be set to: my.home-assistant.io
Features
- Gives you access to your most recent activities in Strava.
- Pulls Recent (last 4 weeks), Year-to-Date (YTD) and All-Time summary statistics
- Pulls current Monday-to-Sunday weekly summary statistics from Strava's activities endpoint
- Creates a camera entity in Home Assistant to feature recent Strava pictures as a photo-carousel
- Supports both the metric and the imperial unit system
- Activity data in Home Assistant auto-updates whenever you add, modify, or delete activities on Strava
- Activity Type Selection: Choose which of the 50 supported activity types to track
- Device Source Tracking: Automatically detects and displays the device used for each activity
- Gear Sensors: Track your bikes and shoes with distance and detailed information (brand, model, etc.)
- Multi-User Support: Add up to 10 Strava accounts sharing a single API app (Standard Tier), or each with their own app credentials
- Webhook-First Architecture: Uses Strava webhooks for real-time updates, respecting API rate limits
- Easy set-up: only enter your Strava Client-ID and Client-Secret and you're ready to go
How It Works
This integration uses a webhook-first architecture to respect Strava's API rate limits:
- Initial Setup: Fetches your data once during configuration
- Real-Time Updates: Uses Strava webhooks to receive updates instantly when you add/modify activities
- No Continuous Polling: Never continuously polls the API, preventing rate limit issues
- API Rate Limit Compliance: Stays well within Strava's limits (100 requests/15min, 1000/day)
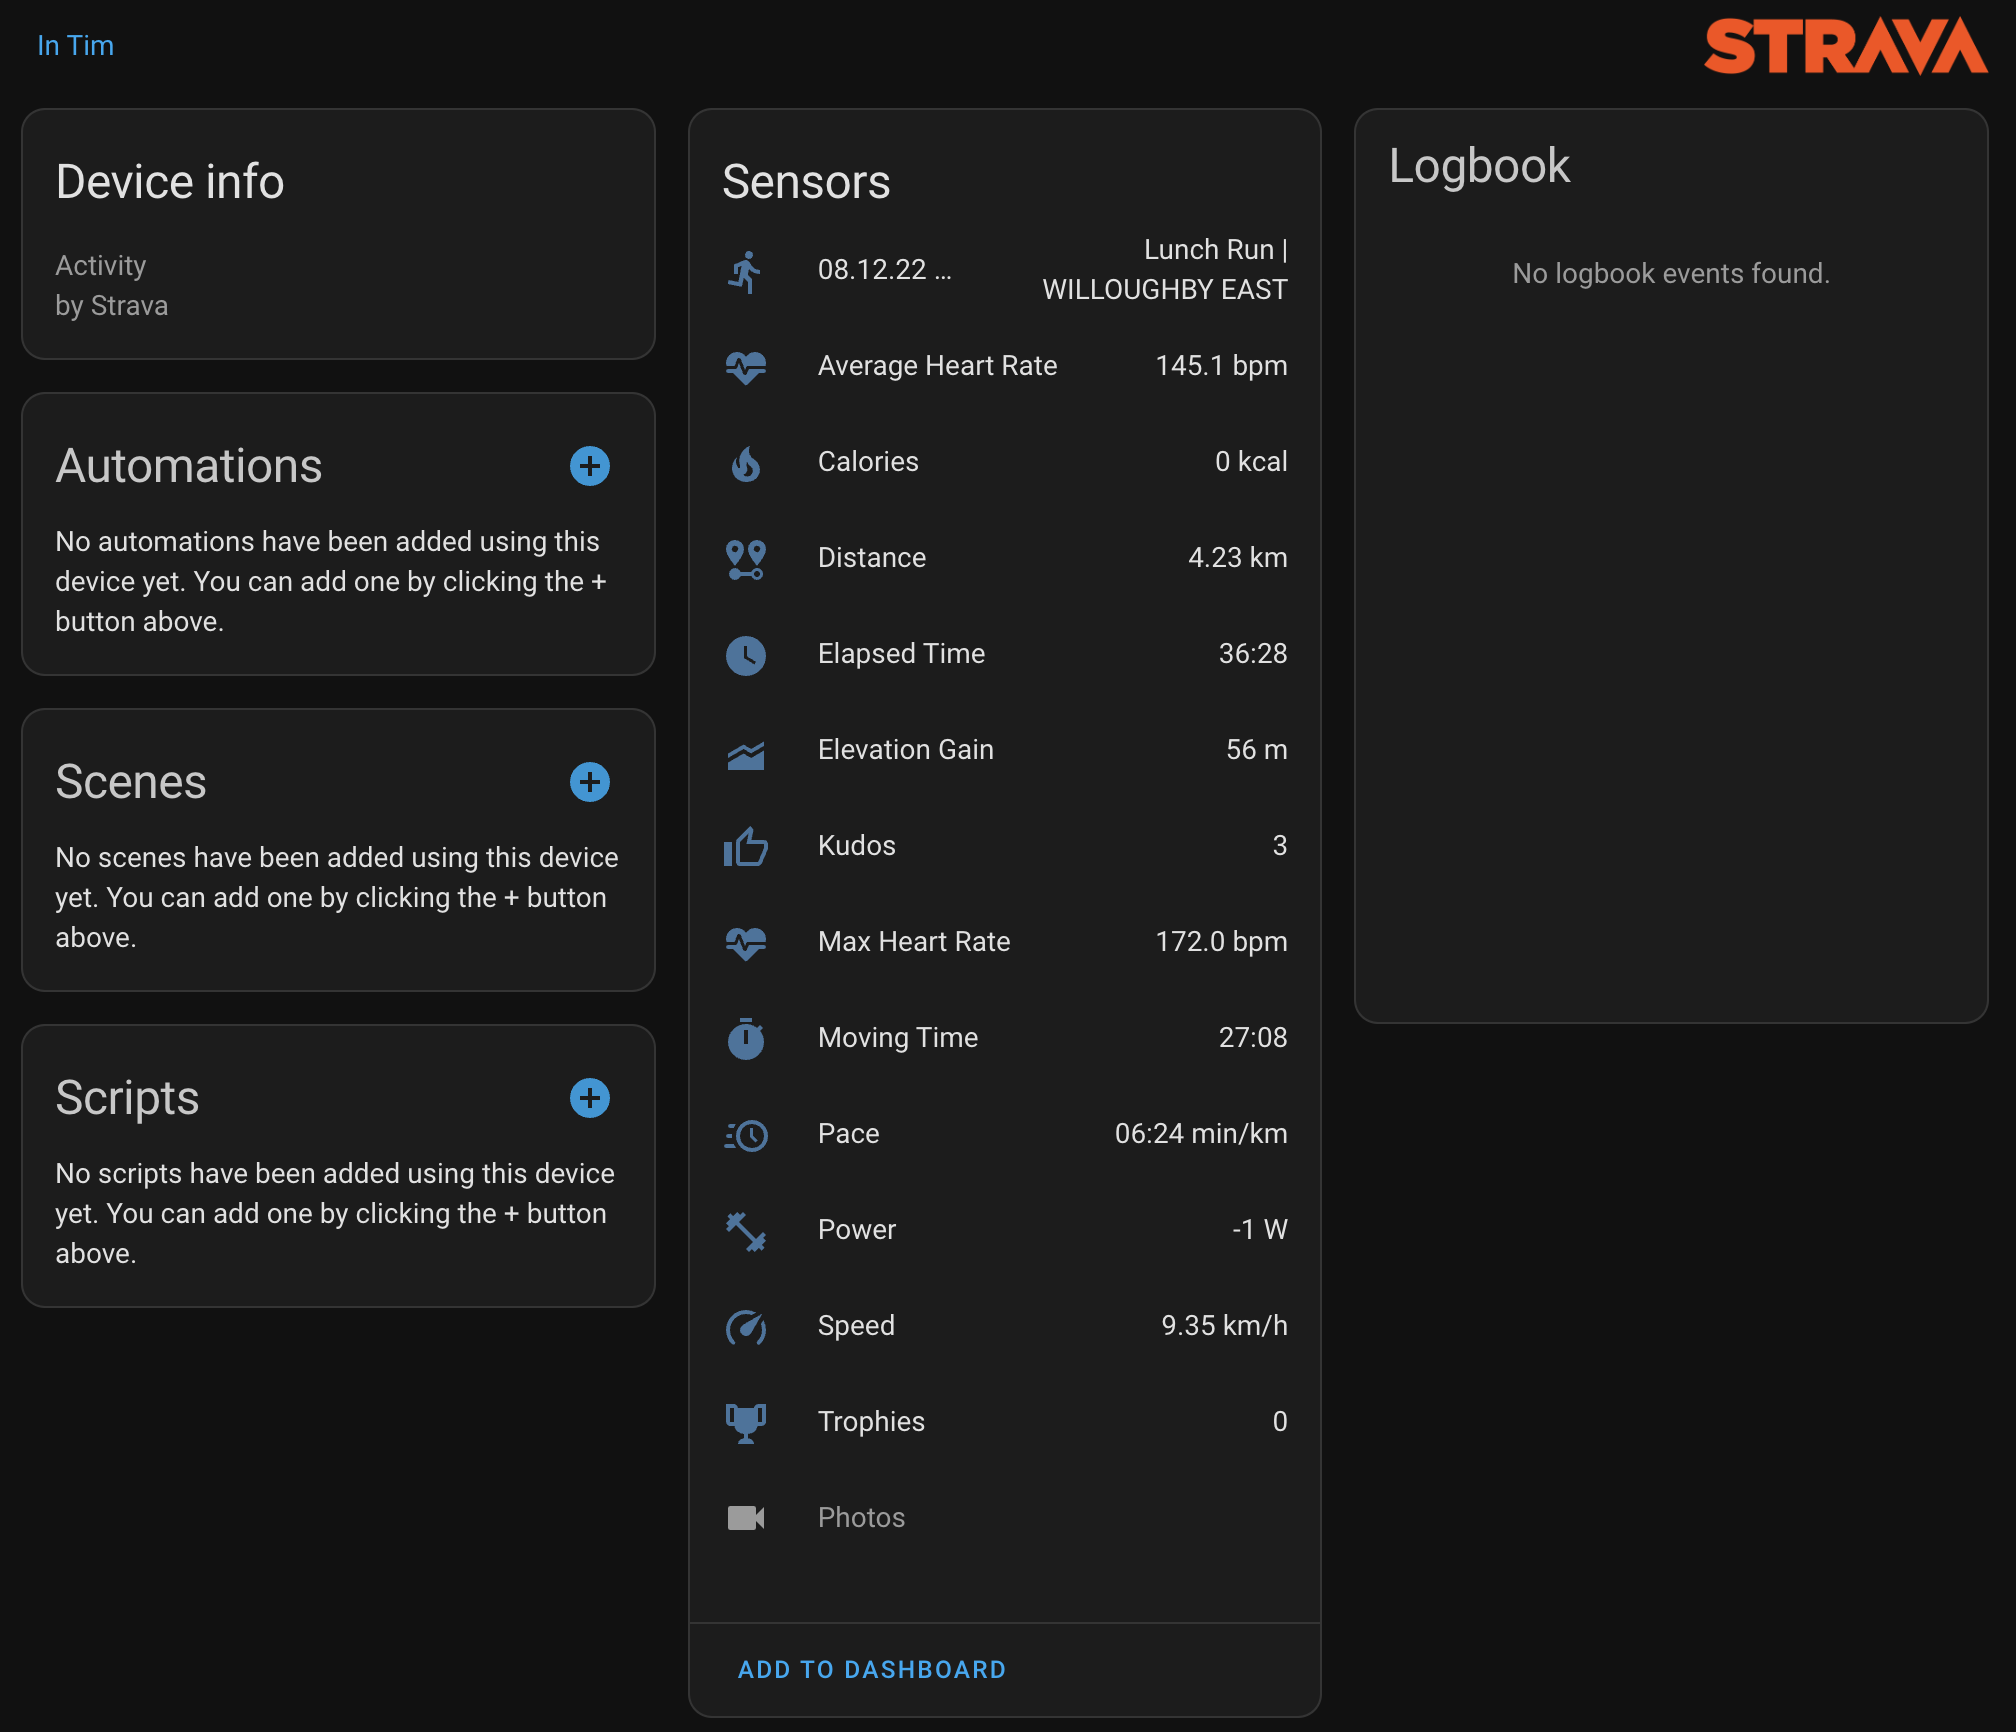
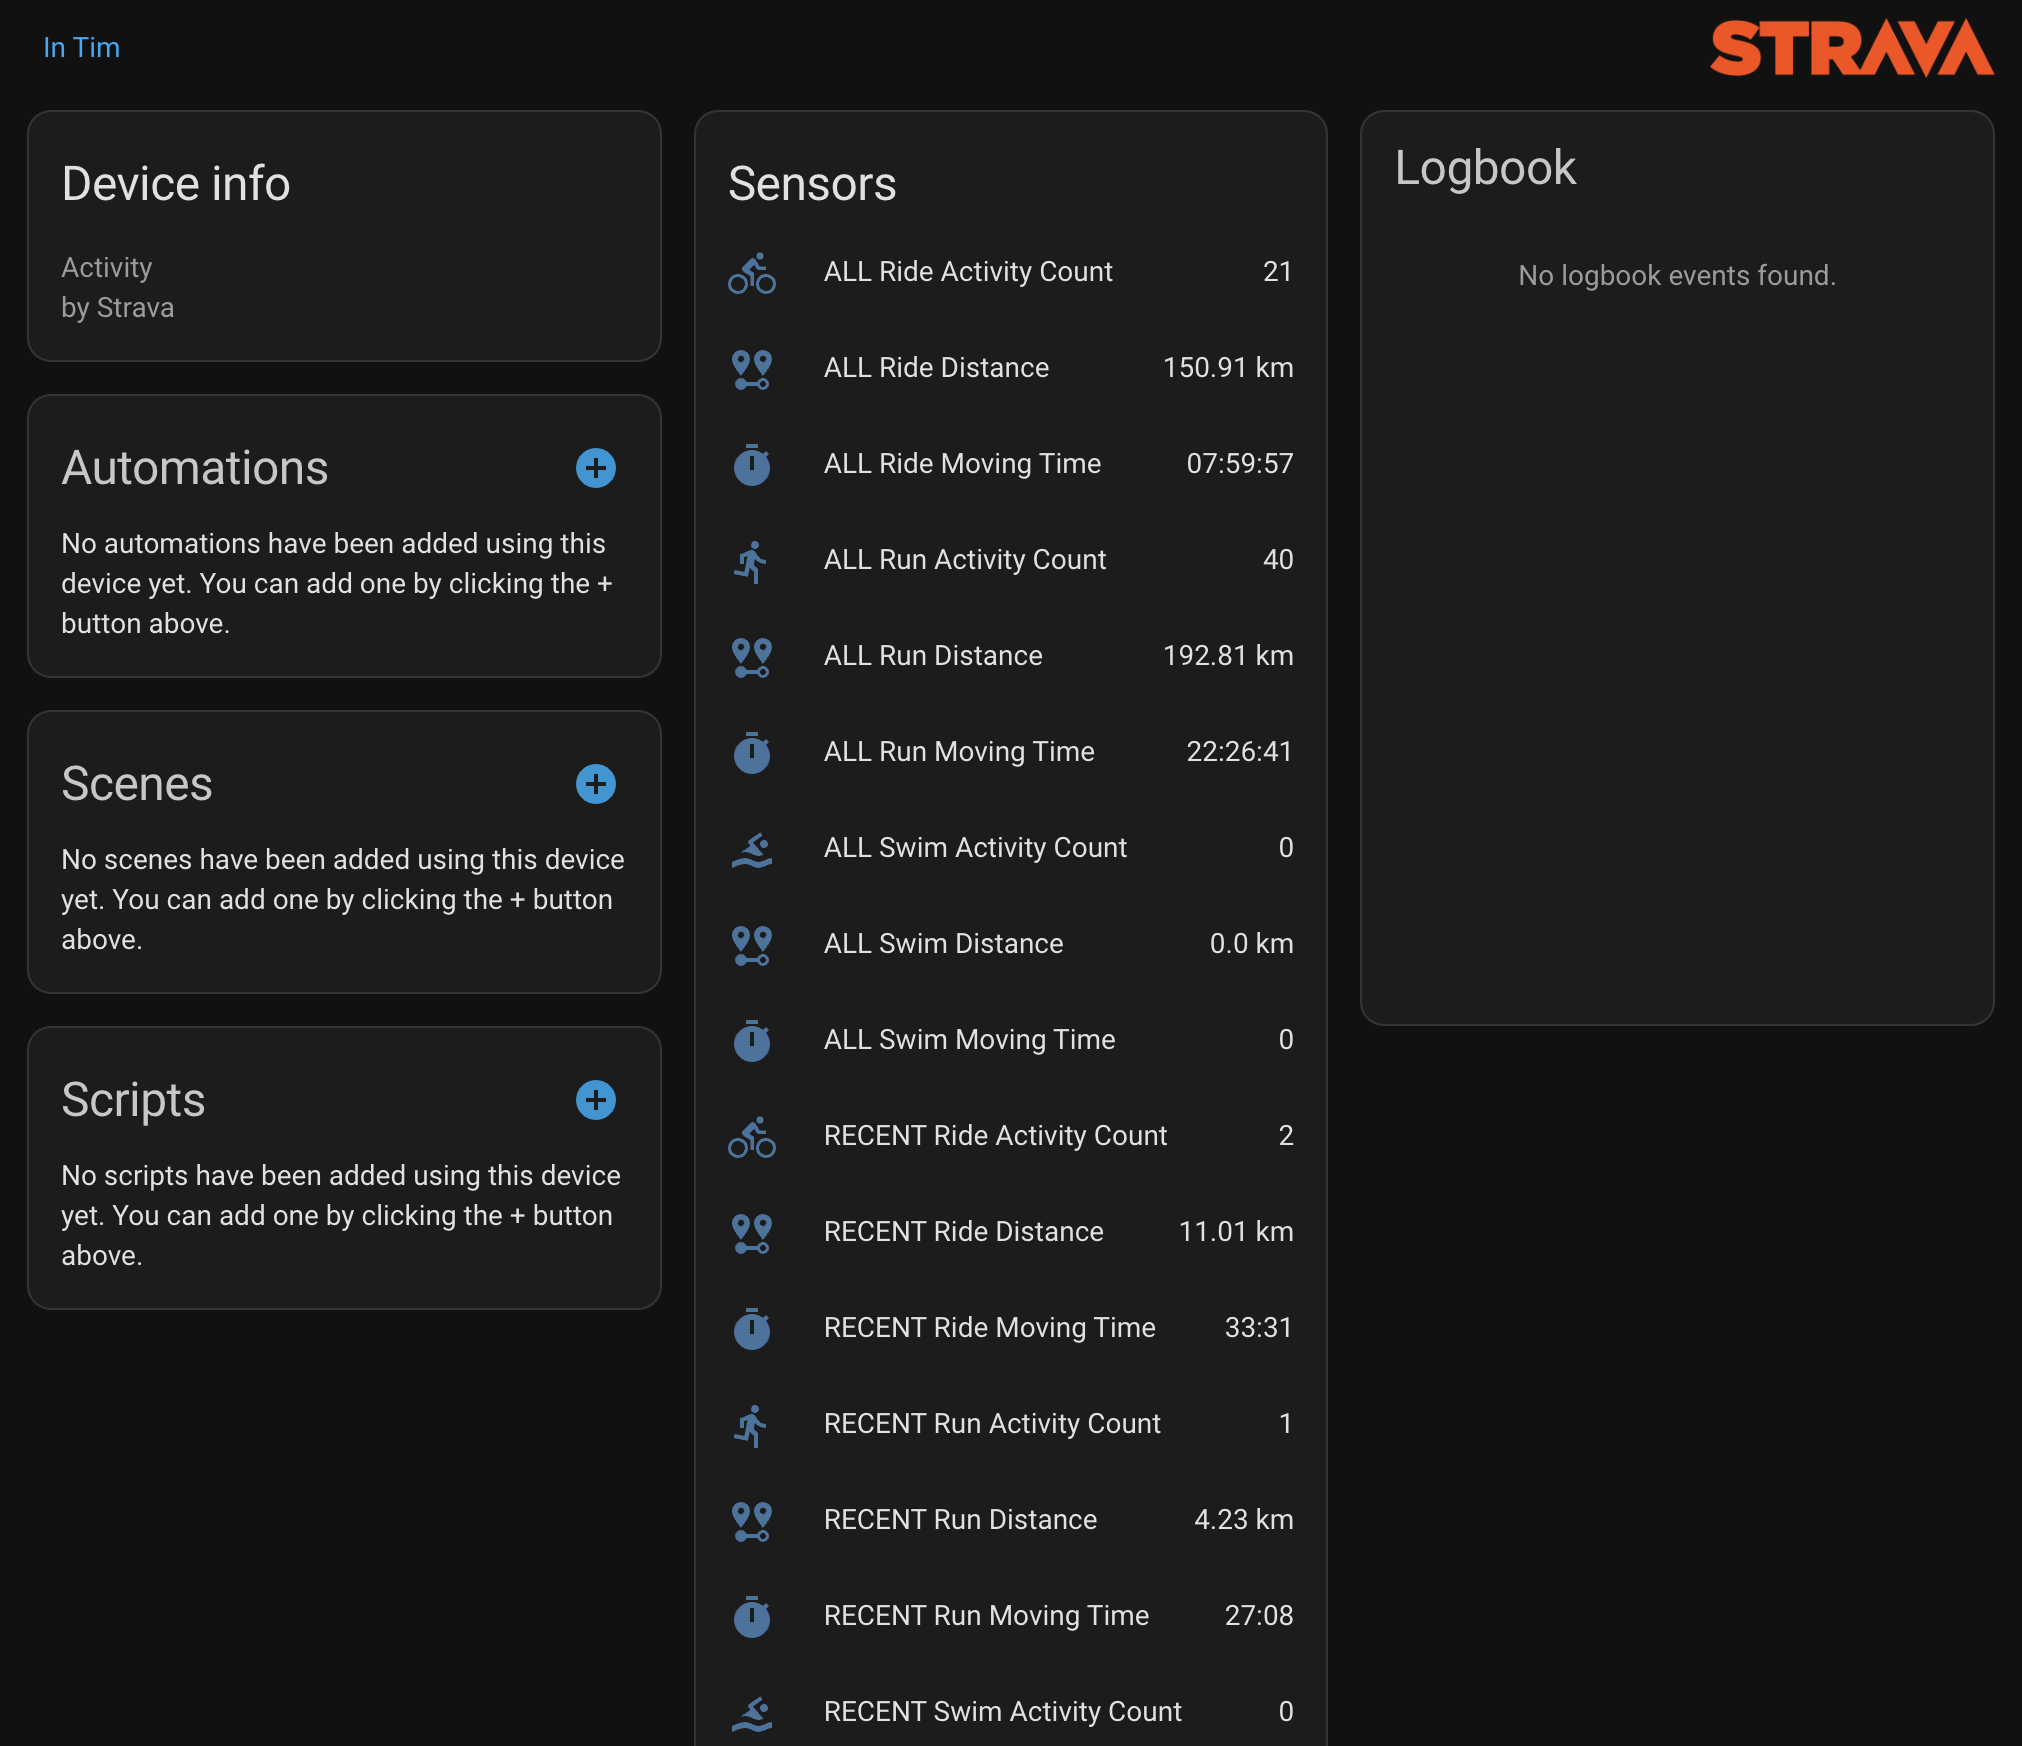
The Strava Home Assistant Integration creates sensor entities for each activity type you choose to track. For each selected activity type, you get:
Activity Sensors:
- Latest Activity: Shows the name of your most recent activity of that type
- Activity Details: Includes distance, time, elevation, heart rate, power, and more
- Device Information: Automatically detects and displays the device used (Garmin, Apple Watch, etc.)
- Recent (last 4 weeks): Distance, activity count, and other metrics
- Weekly (current Monday-to-Sunday week): Distance, activity count, moving time, and elevation gain where applicable
- Year-to-Date: Cumulative statistics for the current year
- All-Time: Lifetime statistics for each activity type
- Gear Name: Shows the name of each gear item (bike or shoe) with attributes including brand, model, and description
- Gear Distance: Tracks the total distance for each gear item with proper unit conversion
- Configure the number of gear sensors to display (1-20, default: 3)
You can use all sensor data in your Dashboards and Automations, just as you'd use any other sensor data in Home Assistant.
Installation
1. Set up remote access to your Home Assistant Installation
To use the Strava Home Assistant integration, your Home Assistant Instance must be accessible from an External URL (i.e. Remote Access). Without remote access, the integration won't be able to pull data from Strava. To learn how to set up Remote Access for Home Assistant, please visit the Official Documentation
_If you use Nabu Casa then do this configuration from your Nabu Casa URL. You can find this under Configuration -> "Home Assistant Cloud"_
2. Obtain your Strava API credentials
Head over to your Strava Profile and go to Settings > My API Application (or click here).
Follow the steps in the configuration wizard to obtain your Strava API credentials (Client ID + Client Secret).
!!! IMPORTANT !!! The Authorization Callback Domain must be set to: my.home-assistant.io
Strava API tiers — how many users can share one app?
| Tier | Athletes per app | How to get it | | ------------------ | ---------------- | ----------------------------------------------------------------------------------------------------- | | Standard (default) | Up to 10 | Self-upgrade in your API settings dashboard — no review needed | | Extended Access | Higher limits | Apply via Strava developer program |
For a single user or a household sharing one Strava API app (up to 10 athletes), one set of credentials is all you need. See "Adding Multiple Strava Accounts" below.
3. Add the Strava Home Assistant Integration to your Home Assistant
As of now, the Strava Home Assistant Integration can only be installed as a custom repository through the Home Assistant Community Store (HACS). The installation process is super easy


4. Make a connection between your Strava account and Home Assistant
Now is the time to fire up the Strava Home Assistant Integration for the first time and make a connection between Strava and your Home Assistant Instance.
From within Home Assistant, head over to Configuration > Integrations and hit the + symbol at the bottom. Search for "Strava Home Assistant" and click on the icon to add the Integration to Home Assistant. You'll automatically be prompted to enter your Strava API credentials. It'll take a few seconds to complete the set-up process after you've granted all the required permissions.
5. Adding Multiple Strava Accounts
The integration supports multiple Strava users in a single Home Assistant instance. Each user gets their own separate integration entry and fully isolated data.
There are two ways to set this up depending on your Strava API tier:
Option A — Shared API app (Standard Tier, up to 10 athletes) ✅ Recommended
One person creates a single Strava API app and shares the Client ID and Client Secret with everyone who needs access. The integration handles webhook deduplication automatically — only one webhook subscription is ever registered regardless of how many users are added.
Setup:
- The app owner self-upgrades their Strava app to Standard Tier in the API settings dashboard (no review required, supports up to 10 athletes)
- Ensure the Authorization Callback Domain is set to: my.home-assistant.io
- Share the Client ID and Client Secret with each user who needs to be added
- For each additional user, in Home Assistant go to
Settings>Devices & Servicesand clickAdd Integration - Search for "Strava Home Assistant" and enter the same Client ID and Client Secret
- Each user completes the OAuth2 flow with their own Strava account — this is what links their personal data
Note: Add users one at a time, not simultaneously, to avoid a race condition on webhook registration.
Option B — Separate API app per user
Each user creates their own Strava app at strava.com/settings/api with a unique Client ID and Client Secret. Follow the same steps 3–6 above, entering each user's own credentials.
Use this approach if you need more than 10 users, or if users prefer to manage their own API apps independently.
Configuration/Customization
Upon completion of the installation process, the Strava Home Assistant integration automatically creates sensor entities for the activity types you select. By default, the integration tracks Run, Ride, and Swim activities.
1. Select Activity Types to Track
You can choose which activity types to track from the 50 supported Strava activity types.
- Go to
Configuration>Integrations - Find the Strava Home Assistant Integration and click
CONFIGURE - Select the activity types you want to track from the multi-select list
- Save your settings
2. Distance Unit System
Three configurations for the _distance unit system_ are available.
Defaultuses the Home AssistantUnit SystemconfigurationMetricuses kilometers (km) and meters (m) for distancesImperialuses miles (mi) and feet (ft) for distances
Configuration > Integrations > CONFIGURE.
3. Photo Updates
You can enable or disable automatic photo updates for the camera entity. When enabled, the integration will fetch new photos from your activities and update the camera entity accordingly.
4. Gear Sensors
You can enable gear sensors to track your bikes and shoes from Strava. When enabled, the integration will:
- Fetch your most recently used gear items (bikes and shoes combined)
- Create a device for each gear item
- Create two sensors per gear:
Configuration Options:
- Enable Gear Sensors: Checkbox to enable/disable gear sensors
- Number of Gear Sensors: Slider to select how many gear items to track (1-20, default: 3)
_NOTES_
- Changing the unit system setting will require a restart of Home Assistant to be fully applied.
- The integration now fetches up to 200 activities instead of being limited to 10.
- Device source tracking automatically detects the device used for each activity (Garmin, Apple Watch, etc.).
Displaying an Activity Route/Map
Activity sensors expose a polyline attribute containing the route as a Google-encoded polyline string. Since that string isn't directly usable by map cards, the integration provides the ha_strava.get_activity_route service to decode it into a list of {lat, lon} coordinates on demand — keeping the raw encoded string in sensor attributes (recorder-friendly) while giving you real coordinates when you need to render a map.
Note: If you have map visibility hidden in your Strava privacy settings, Strava's API won't return route data for your activities — this applies even to your own activities. Check Strava Settings → Privacy Controls → Map Visibility if the polyline attribute is empty or the route service returns no data.
Calling the service:
service: ha_strava.get_activity_route
data:
  activity_id: "1234567890"
The service returns a response shaped like:
route:
  - lat: 38.5
    lon: -120.2
  - lat: 40.7
    lon: -120.95
Rendering the route on a map card:
The journey-viewer-card Lovelace card can render Strava-style per-activity maps using this service. It reads activity data from any sensor matching its data contract and lazily loads the route via a configurable route_service hook, which you can point at ha_strava.get_activity_route. See the card's documentation for full setup instructions.
Personal Records and Segment Leaderboards
Activity sensors also expose PR and KOM/QOM data pulled from the segment efforts already included in the activity detail response, so no extra API calls are needed:
pr_count— number of segments in the activity where a new all-time personal record was set. Available as its own metric sensor alongsideachievements.pr_segments— list of segment names where a new all-time personal record was set on this activity.kom_segments— list of segment names where this activity currently holds the King/Queen of the Mountain spot (leaderboard #1).
Note: Strava appears to only populate achievement and segment-effort data (achievements,pr_count,pr_segments,kom_segments) for activities visible to Everyone. Activities set to Followers Only or Only You have consistently returned empty/zero values for these fields in testing, even though Strava's own app may still show achievements to you privately. If these attributes stay empty for an activity you expect to have achievements, check its visibility setting on Strava.
Note: The "Trophies" sensor was renamed to "Achievements" to match Strava's own terminology, and now correctly reads its count from the same endpoint Strava's UI uses (previously it could show 0 even when Strava displayed real achievements). Upgrading installs keep their existing entity ID (still ending in _trophies) so history and automations aren't broken — only the displayed name changes. Rename the entity ID manually via the UI if you'd like it to match.